How to edit reflective surface?
2020-11-10 09:22:00
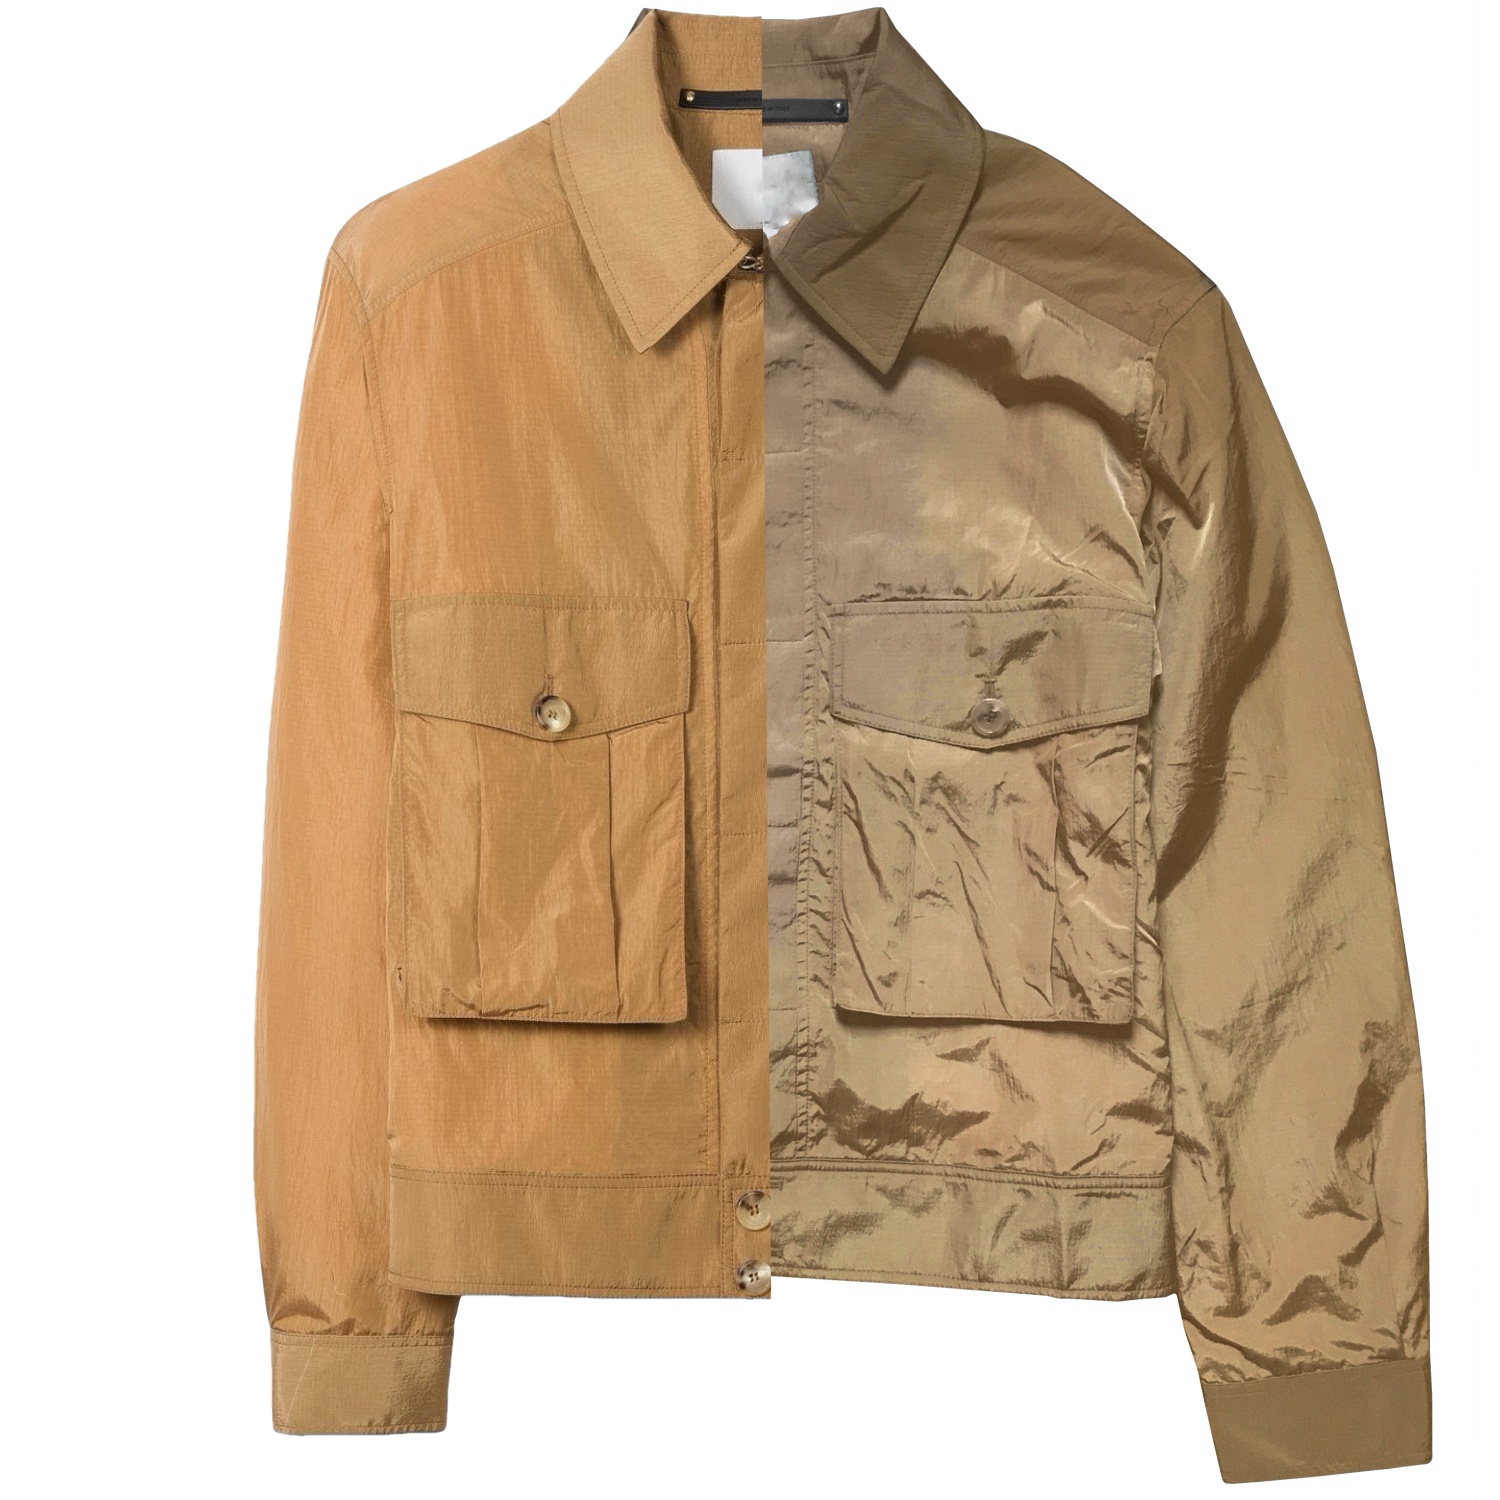
The right half is the actual photo and the left half is the result I want to get after editing. It's a nylon fabric with some reflection. I've tried using the burn tool and color adjustment tools (brightness, exposure, levels...) but the result isn't very close. Is the result achievable from the actual photo? Can you tell me how to do that? Many thanks

2021-03-25 10:30:44
I can see this is an old post so the answer is probably long overdue but I believe I've found a technique that works fairly well for this particular edit and I thought I'd share it. Perhaps it'll still be of help to you or for someone working on similar edits.
Basically, what you'd want to do here is use the color of the image on the left and blend it with the image on the right. This helps imitate similar lighting conditions which are originally quite different in both photos. For any additional touchups like removing the harshest of shadows or evening out the texture of the fabric, you can use the Repair or the Clone tools.
So, without further ado, here's a rough rundown of the steps (I'll presume you have both of these images open as separate layers and for the sake of clarity, will be calling the left image "target" and the right image "original"):
1. First, choose the target image layer and, using the Repair tool, remove any details like seams, buttons, or folds so that only the texture remains.
2. Next, choose the original image layer and carefully cut out the jacket from the white background. You can use the Magic Eraser (E) tool for this.
3. Once you've done that, make sure the target image layer is on top of the layers list and create a clipping mask (Control-click the layer and choose Create Clipping Mask).
4. Set the blend mode of the top layer to Color.
5. You may notice that not all of the areas of the original image have acquired the desired color. You can then grab the top layer, and using the Move tool, resize it and position it to fully cover the jacket.
6. For any labels or buttons that you want to keep the original color, add a layer mask to the top layer, then paint over them with a black brush to reveal them.
7. Finally, select the original image layer again and use the Repair or Clone tools to touch up any areas that stand out. How far you want to take it really depends on you. Also, if you're using the Clone tool, blend modes can also come in handy. For instance, when removing shadows, you can set the Clone tool blend mode to Lighter Color. This way, only the areas that are darker than your clone source will be affected. If not — these areas will be left untouched.
Using the above steps, it's possible to get a result that looks something like this:
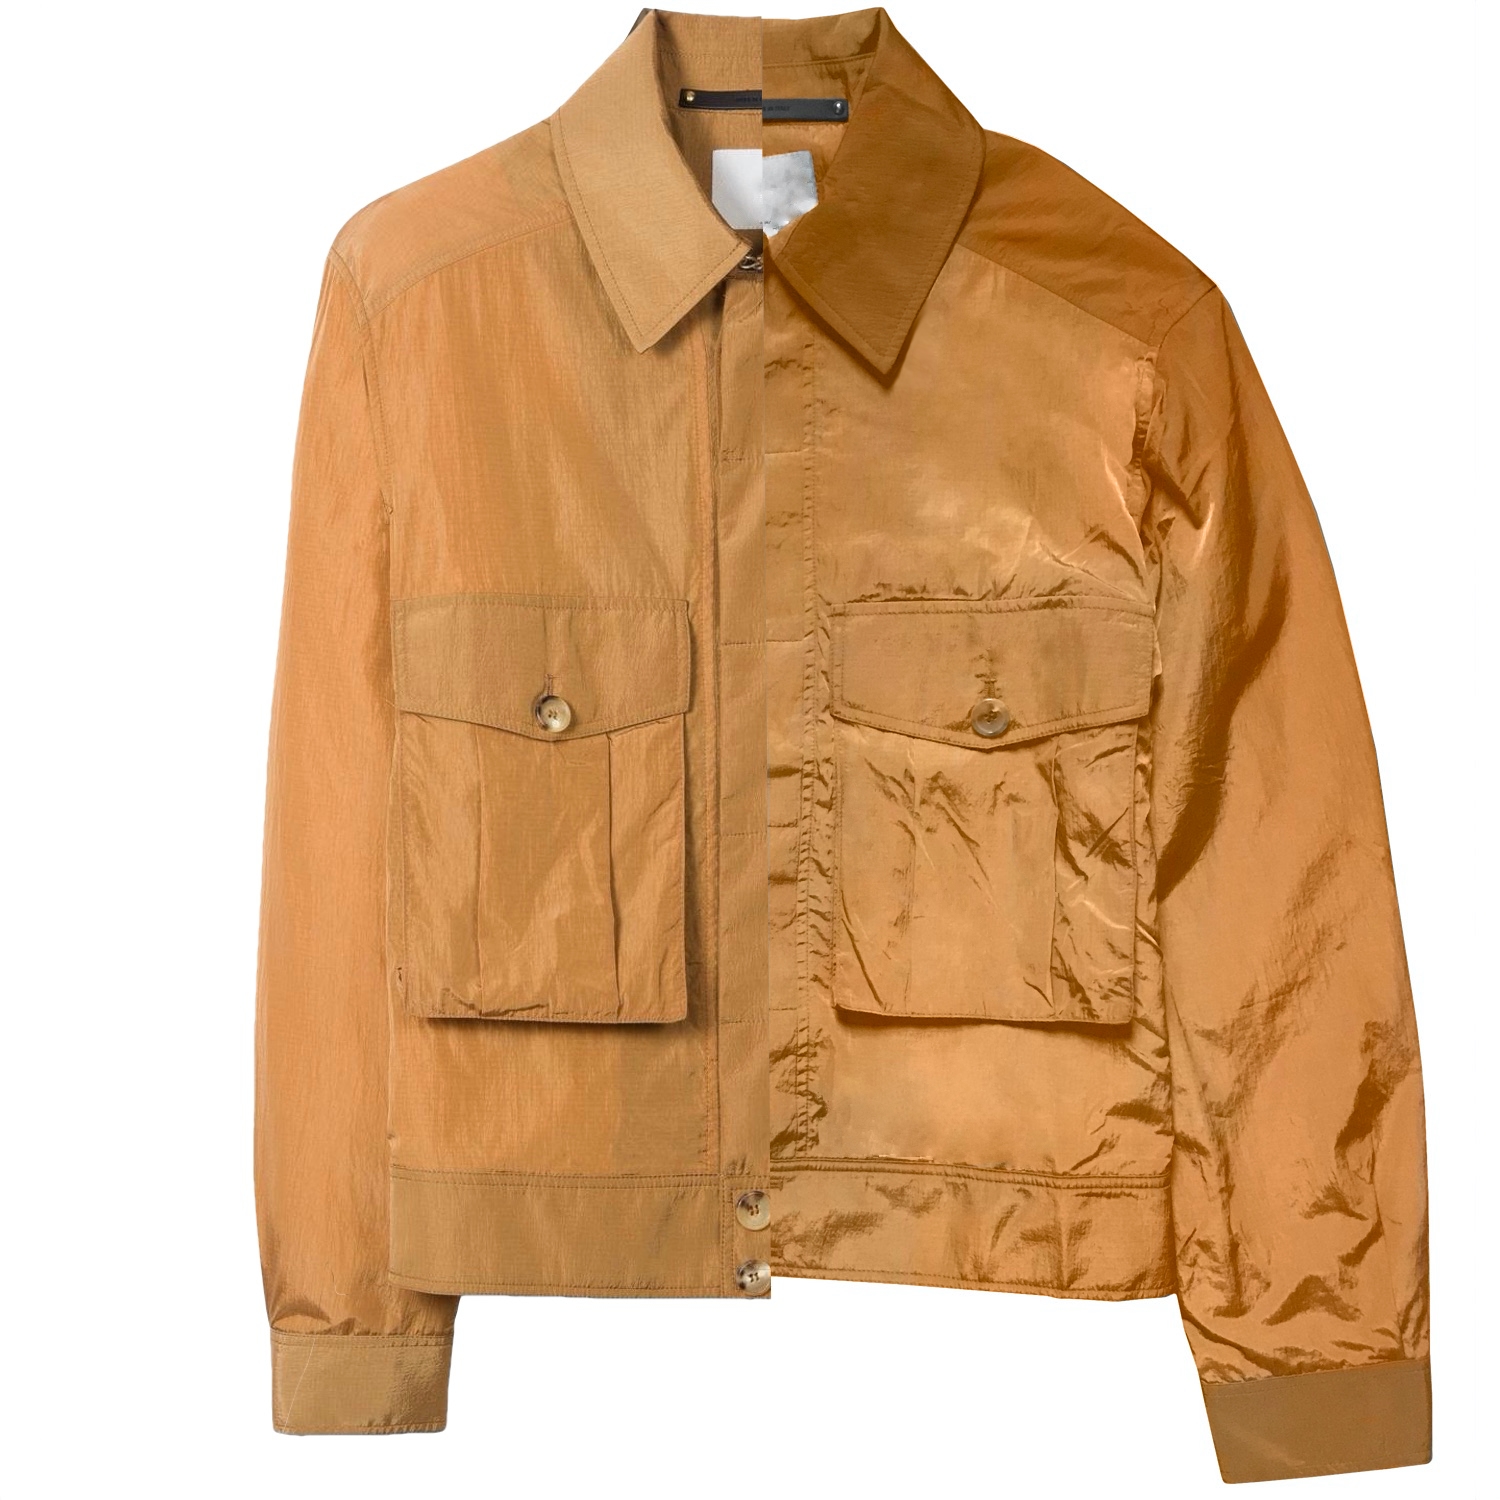
Of course, if you dedicate more time to it, the result should look even better. Anyway, I hope this helps!