Suggestions for changing contrast in one part of photo

Look for Pixelmator tutorials, tips & tricks, and how-to’s here.
User avatar

2021-06-18 01:19:08

I am a refugee from the film era who is skowly- VERY slowly- learning digital tools.
I have a shot scanned from a film negative that I would like to enhance the foreground contrast- just slightly, I want to go subtle, not the obvious 'Overshopped' look. Basically the foreground needs to come up slightly in brightness and add a bit of contrast so the horses stay dark. The sky is about where I want it bu the sky remains vexing. This image was challenging in silver and remains so in digital.

I know layers will be a part of the solution but looking for workflow and/or tutorials (what tools etc). In a perfect world I'd have more detail in the clouds (visible in the negative) but maybe that's not for right now.

FWIW I have both Classic and Pro on my Mac. Thanks in advance for any guidance. The image:

Image

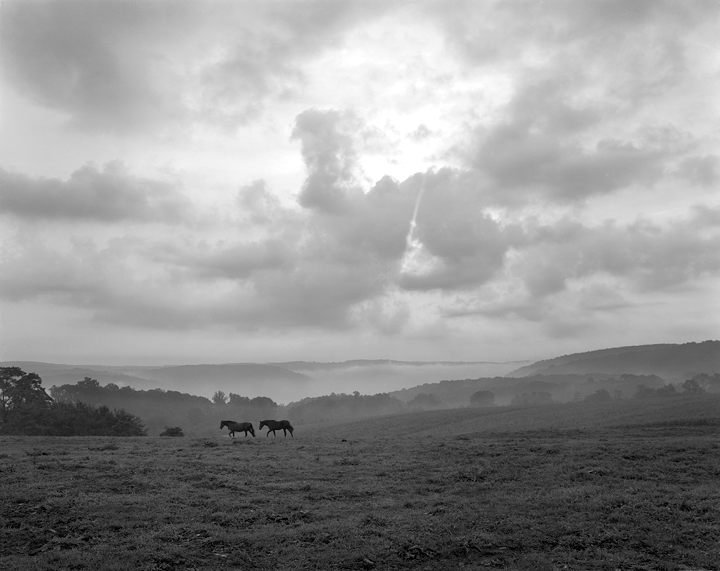
In the smaller view size the contrast deficit in the foreground is much less obvious. But, that is what I am trying to do.
User avatar

2021-06-28 12:43:32

Hey there! We're currently working on color adjustment improvements in Pixelmator Pro that should make shadow and highlight editing a bit more independent from one another. In the meantime, I'd probably try experimenting with a combination of two Lightness adjustments — bring out more details in the foreground using Shadows, then drag the Black Point slider to bring back some contrast to the darker areas of an image. Hope that helps!
User avatar

2021-07-07 03:19:31

Thanks, I will try that but was thinking I need to separate the foreground into a separate layer to work on that separately (the adjustments you describe sound 'on point' though.. So if I do that, one of the selection tools to create a separate layer for the foreground up to the treeline?

If I adjust the whole image that way, the clouds (which are already a two-excedrin headache to get right) will only get tougher, it seems to me.
User avatar

2021-07-08 14:34:21

Sure, you can always use selections to set boundaries only around the areas you'd like to adjust. Separating the image into layers is not necessary if you're working destructively — as long as the selection is active, you can make edits to the image directly. This method will merge all the color adjustments you make once you deselect your selection.

If you'd like to keep your changes editable, though, Control-click inside the selection and choose Copy and Paste as Layer to create a copy of the selected area on a new layer. You can then adjust your selection nondestructively.
User avatar

2021-08-07 23:56:52

by Aurelija 2021-07-08 18:34:21 Sure, you can always use selections to set boundaries only around the areas you'd like to adjust. Separating the image into layers is not necessary if you're working destructively — as long as the selection is active, you can make edits to the image directly. This method will merge all the color adjustments you make once you deselect your selection.

If you'd like to keep your changes editable, though, Control-click inside the selection and choose Copy and Paste as Layer to create a copy of the selected area on a new layer. You can then adjust your selection nondestructively.
'Copy and Paste as Layer' sounds like what I have in mind. I do want to keep my changes editable. I want to be able to get the sky where I want it on the top layer and have the sky are transparent on the top layer, then tweak the foreground to look 'right' against that sky. I may move the boundary of that layer to the distant horizon, which seems like it would be a lot easier to select.