Table of Contents
Interface overview
When you open a photo to edit in Photomator, you'll notice two main sections — the toolbar with all the available tools and settings, and your photo in the center. The photo editing mode is activated when you select a tool. The options for that particular tool appear in a separate sidebar, presets bar, or tool options bar, and change according to your selected tool.

1. Cancel and go back to photos
Tap Cancel to close a photo and return to the Photos or Files browser. If you already applied some changes to a photo, a "Discard Changes" pop-up will appear. Tap it to return to photos without saving changes.
On Mac, click ![]() and choose Discard.
and choose Discard.
2. Undo and redo changes
Allows you to undo the changes you've made to a photo step by step. You can also touch and hold ![]() to redo the last action.
to redo the last action.
When in the Photos browser, you can also touch and hold a photo thumbnail and choose Revert to Original from the Quick Actions menu that appears.
3. Revert to Original
Reverts the photo to the original. All changes from all previous editing sessions are removed. You can also touch and hold a photo directly in the Photos browser to choose Revert to Original from the Quick Actions menu.
4. Comparison slider
Shows a split view of your photo. Drag the split preview slider to compare the photo before and after edits.
5. Name of the photo
You can rename your photos saved in the Files browser. Touch and hold the thumbnail of a photo you'd like to rename and choose Rename to do so.
Note: It is not possible to rename photos in the Photos browser — you can do that via the Files browser only.
6. ML Enhance
Automatically enhances colors, contrast, and brightness of a photo. You can additionally tweak the photo using the settings available in the Color Adjustments pane.
7. Super Resolution
Increases the resolution of your photos while keeping them sharp and detailed. See ML Super Resolution to learn more.
8. Repair
Use the Repair tool to retouch your photos from subtly removing small imperfections to eliminating entire objects. You can learn more about repairing in the Repair tool section of this guide.
9. Crop
Remove unnecessary parts of a photo automatically using machine learning-powered cropping, apply crop presets, or adjust the crop box size and position it manually.
In the Crop tool options, you can also switch to Straightening or Perspective Transform modes, rotate or flip the photo vertically or horizontally.
10. Color Adjustments
Use the Color Adjustments tool to adjust the colors and contrast of a photo, add sharpness, or other special photographic effects. You can also choose from a collection of color adjustment presets created by the Pixelmator Team to give your photo an instant color change. See About color adjustments to get started.
11. More settings
Share and export photos, view their information, copy or paste adjustments, and turn a number of Photomator settings on or off to best suit your workflow.
12. Save and close a photo
Saves the changes you made to a photo, closes a photo, and returns to the Photos or Files browser.
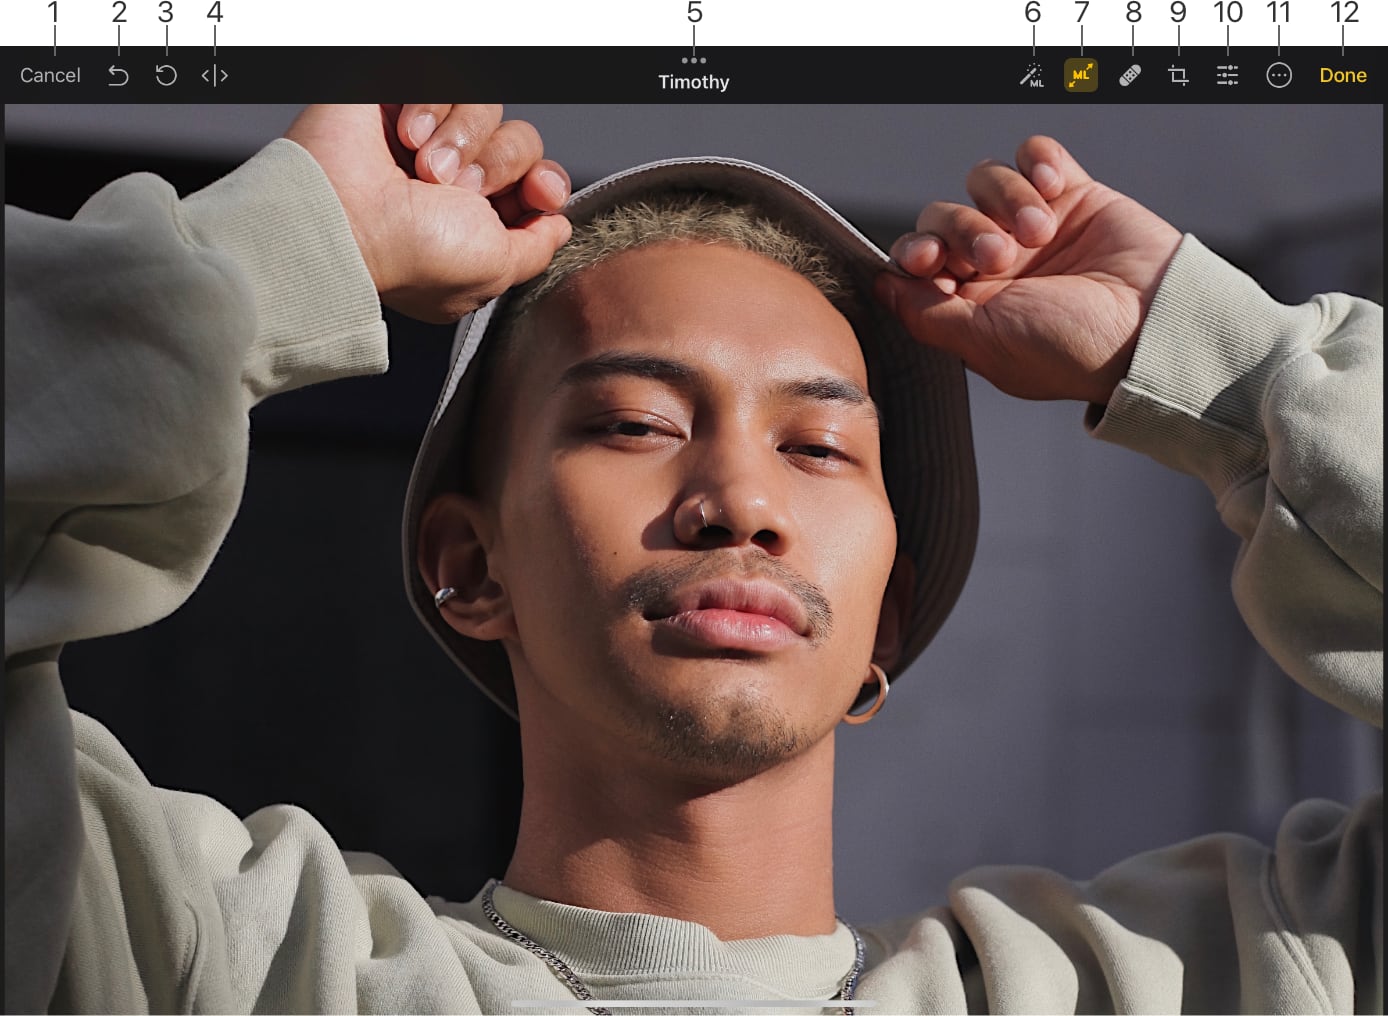
1. Cancel or go back to photos
Tap Cancel to close a photo and return to the Photos or Files browser. If you already applied some changes to a photo, an option to discard or save those changes will appear. Tap Discard Changes to return to the Photos browser without saving changes or choose Save Changes to keep them.
2. Undo, redo, or revert all changes
Allows you to undo the changes you've made to a photo step by step. You can also touch and hold ![]() to redo the last action or choose Revert to Original to revert the photo to the original — all changes from any of the previous editing sessions will be removed.
to redo the last action or choose Revert to Original to revert the photo to the original — all changes from any of the previous editing sessions will be removed.
You can also touch and hold a photo directly in the Photos browser to choose Revert to Original from the Quick Actions menu.
3. Comparison slider
Drag the split preview slider to compare the photo before and after edits.
4. ML Enhance
Automatically enhances colors, contrast, and brightness of a photo. You can additionally tweak the photo using the settings available in the Color Adjustments pane.
5. Repair
Use the Repair tool to retouch your photos from subtly removing small imperfections to eliminating entire objects. You can learn more about repairing in the Repair tool section of this guide.
6. Crop
Remove unnecessary parts of a photo automatically using machine learning-powered cropping, apply crop presets, or adjust the crop box size and position it manually.
In the Crop tool options, you can also switch to Straightening or Perspective Transform modes, rotate or flip the photo vertically or horizontally.
7. Color Adjustments
Use the Color Adjustments tool to adjust colors and contrast of a photo, add sharpness, or other special photographic effects. You can also choose from a collection of color adjustment presets to give your photo an instant color change. See About color adjustments to get started.
8. More settings
Share and export photos, view their information, copy or paste adjustments, turn a number of Photomator settings on or off to best suit your workflow.
9. Save and close a photo
Saves the changes you made to a photo, closes it, and returns to the Photos or Files browser.
Use the filmstrip browser
When editing photos in the Photos browser, you'll also find that a filmstrip becomes available on your screen. You can use the filmstrip to browse through photos in the album you're in or tap the photo thumbnail to start editing. If you swipe left or right on the opened photo, the next or previous photo in the filmstrip will be automatically selected.
Note: If swiping to show the next or previous photo doesn't work, zoom out of the image and make sure the Crop and Repair tools are deselected.
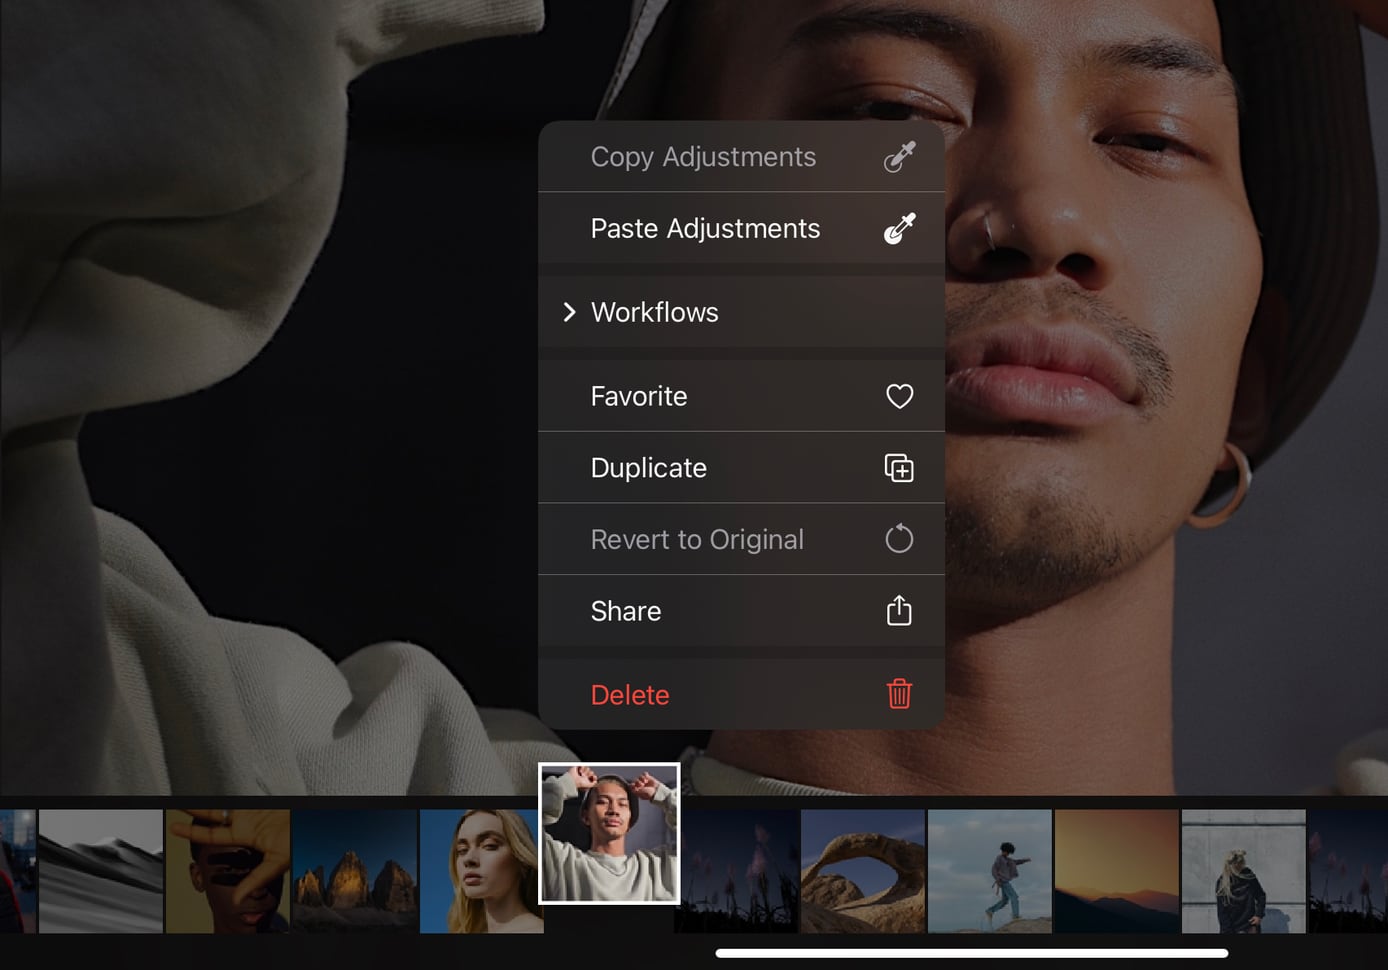

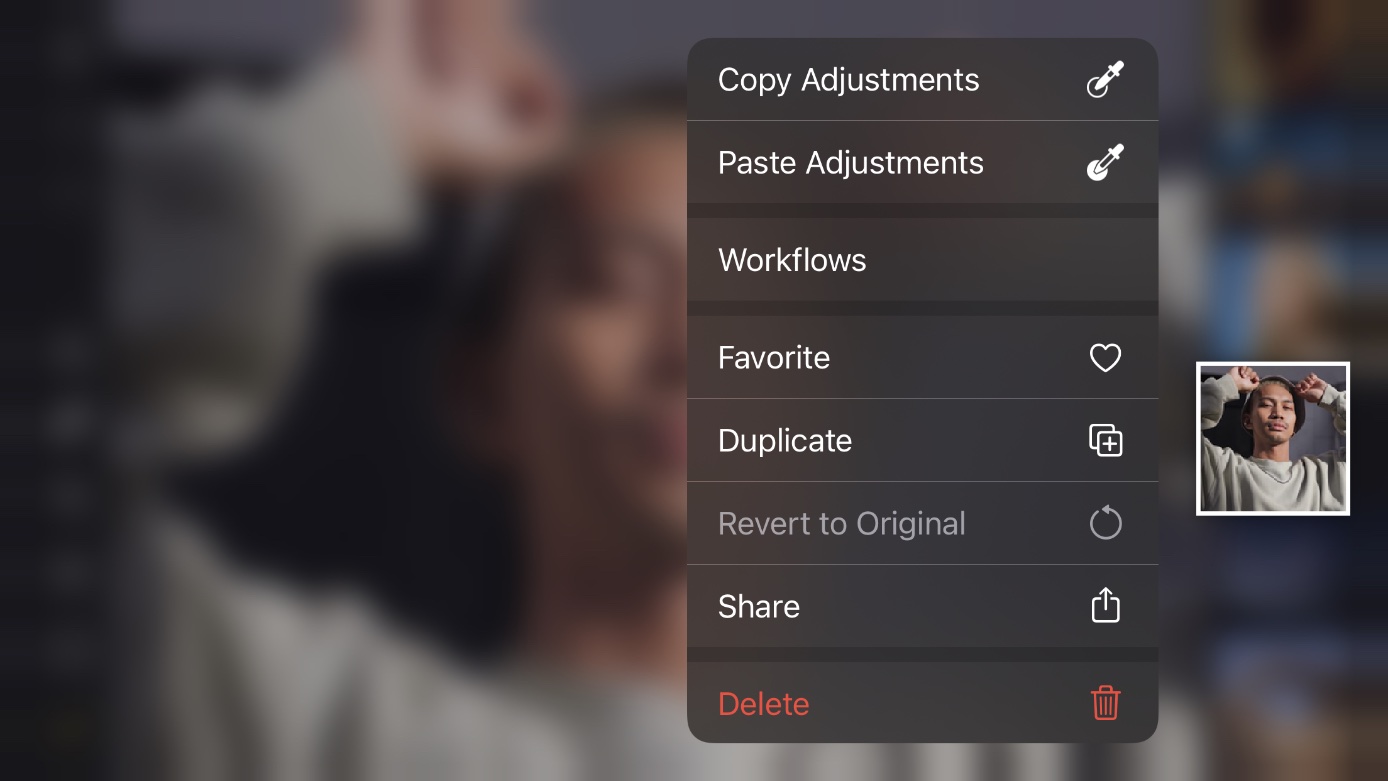
If you touch and hold a thumbnail in the filmstrip, it'll open the Quick Actions menu. Here, you can choose to copy or paste adjustments from photo to photo, run pinned workflows, add photos to Favorites, delete them, and more.
You can turn the filmstrip on and off in the Photomator settings.