Table of Contents
Crop and straighten an image
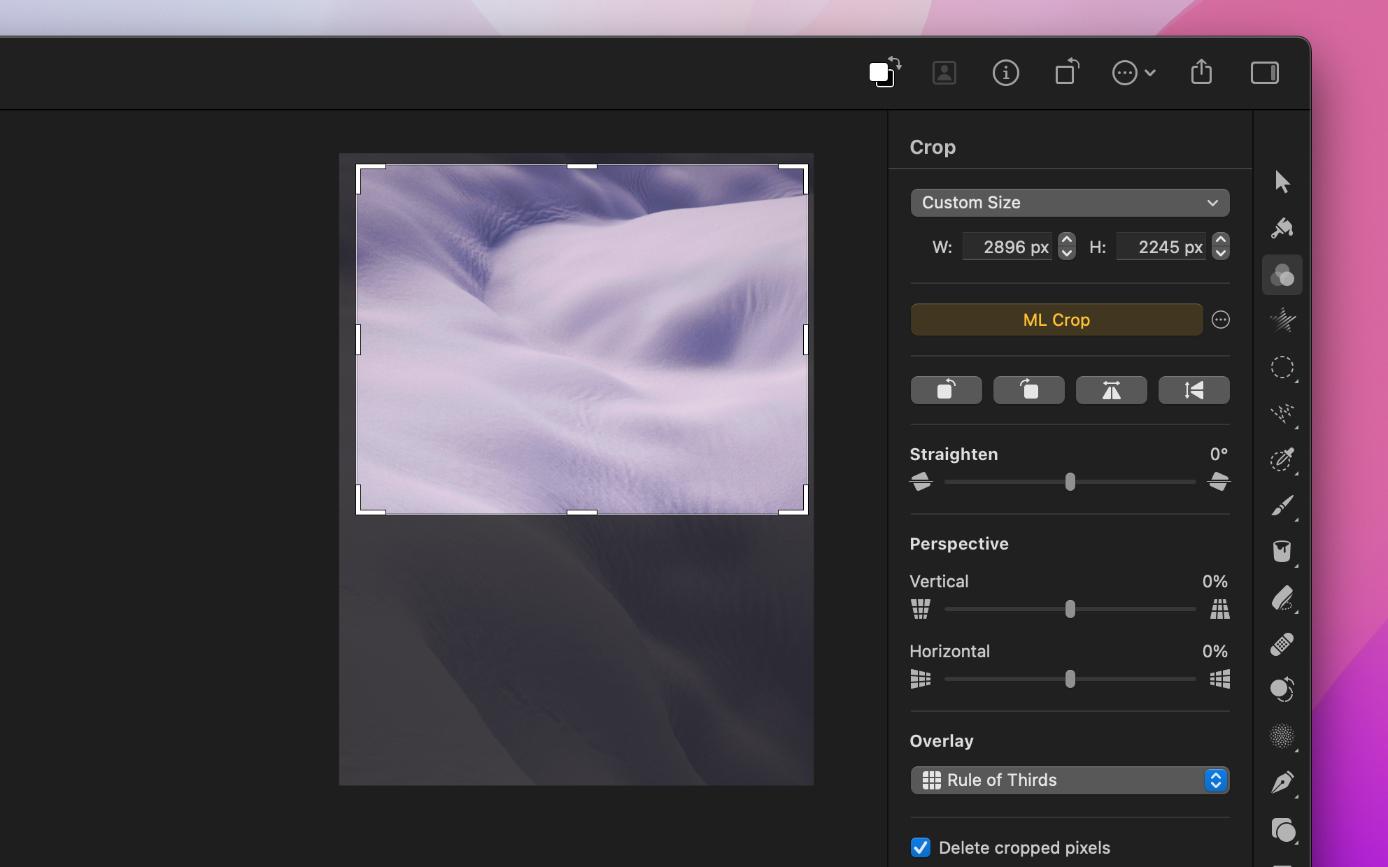
You can crop images to improve their composition or eliminate unwanted parts. When cropping, you can use a preset or custom aspect ratio, or you can constrain the image to its original aspect ratio. You can also straighten or fix perspective of images that were taken at an angle unintentionally.
Crop and straighten an image
Choose the Crop tool by doing one of the following:
- Click
 in the Pixelmator Pro
Tools sidebar.
in the Pixelmator Pro
Tools sidebar. - Choose Tools > Crop (from the Tools menu at the top of your screen).
- Press the key on your keyboard.
- Click
Resize the crop box to select the area of your image you want to keep by dragging the crop box handles or by entering a custom size into the width and height fields or use text field math to calculate it.
To constrain the crop box to an aspect ratio, click the Constrain pop-up menu and choose from the available presets.
To straighten the image, drag anywhere outside the crop box, drag the rotation slider in the Tool Options pane, or click the rotation buttons at either end of the rotation slider. You can also enter a specific degree in the Angle field.
Tip: If you're looking to crop an image to a specific shape, such as ellipse or triangle, you can use a clipping mask. See Use clipping masks to learn more.
To quickly reset the crop box to the original image height, fit the image into a crop box, switch between constrained and free cropping, or automate other cropping and straightening tasks, you can use keyboard shortcuts. See Pixelmator Pro keyboard shortcuts to find the complete list of Crop tool shortcuts.
Note: When resizing, the crop box Pixelmator Pro shows an overlay to help you adjust the crop box more precisely. You can learn more about changing the overlay type or its display settings in the "Choose a crop overlay" section below.
Constrain the crop box to a custom aspect ratio or size
Choose the Crop tool by doing one of the following:
- Click in the Pixelmator Pro
Tools sidebar.
- Choose Image > Crop (from the Image menu at the top of your screen).
- Press the key on your keyboard.
- Click
If a crop preset is selected, click the Constrain pop-up menu and choose Custom Aspect Ratio or Custom Size.
In the Tool Options pane, enter a new crop ratio or size into the designated fields.
Choose to hide or delete the cropped areas of an image
When cropping, you can choose whether you’d like to hide or delete the cropped contents of an image.
Choose the Crop tool by doing one of the following:
- Click in the Pixelmator Pro
Tools sidebar.
- Choose Image > Crop (from the Image menu at the top of your screen).
- Press the key on your keyboard.
- Click
Select "Delete cropped pixels" to permanently delete the cropped areas of an image or deselect it to crop the image nondestructively and hide the cropped areas of an image instead.
Crop an image automatically
You can crop an image automatically using machine-learning powered Crop. ML Crop uses machine learning to predict the best crop for a selected aspect ratio.
Choose the Crop tool by doing one of the following:
- Click in the Pixelmator Pro
Tools sidebar.
- Choose Image > Crop (from the Image menu at the top of your screen).
- Press the key on your keyboard.
- Click
Click ML Crop in the Tool Options pane. The button will light up yellow to tell you ML Crop has been used on the image.
With the ML Crop turned on, you can browse through available crop presets for other crop suggestion based on a particular crop aspect ratio.
Straighten an image automatically
If you’d like to straighten the image automatically, you can use the Auto Straighten feature. Auto Straighten automatically locates the horizon line in images and straightens them accordingly.
To automatically straighten an image:
Choose the Crop tool by doing one of the following:
- Click in the Pixelmator Pro
Tools sidebar.
- Choose Image > Crop (from the Image menu at the top of your screen).
- Press the key on your keyboard.
- Click
Click
 next to the ML Crop button in the Tool Options pane and choose Auto Straighten.
Remember the last used crop aspect ratio
In certain workflows, it may be useful to be able to reapply the last used crop ratio. You can set Pixelmator Pro to remember this setting following these steps:
Choose the Crop tool by doing one of the following:
- Click in the Pixelmator Pro
Tools sidebar.
- Choose Image > Crop (from the Image menu at the top of your screen).
- Press the key on your keyboard.
- Click
Click the Constrain pop-up menu at the top of the Tool Options pane.
Choose how you want Pixelmator Pro to remember the last used aspect ratio:
- Always: Remembers the last used aspect ratio across different documents and different editing sessions.
- For the current document: Remembers the last used aspect ratio for a specific document. If you open or create a new document, the crop ratio will default to "Custom Size".
- Never: The last used aspect ratio is not remembered when you switch between tools, open other documents, or start new editing sessions.
Choose a crop overlay
When cropping images, you can make use of the handy cropping guides often used in photography and image editing. There are 7 different guides you can choose from and although you can always crop images however you like, crop guides can suggest new ways of looking at an image or help achieve more eye-catching and balanced compositions.
Choose the Crop tool by doing one of the following:
- Click in the Pixelmator Pro
Tools sidebar.
- Choose Image > Crop (from the Image menu at the top of your screen).
- Press the key on your keyboard.
- Click
Click the Overlay pop-up menu and choose the guide you want.
Rule of thirds: Adds a grid consisting of 9 rectangles. Typically, the focal objects of an image are placed along the two middle lines or at the points where the rectangle lines intersect. For instance, the top-right intersection is where the human eye naturally travels when looking at an image, so if there are any objects in your image you want to draw attention to, you can place them there.
Grid: Adds a simple grid to the image. When straightening an image, this grid can be used to adjust horizontal and vertical lines more precisely.
Diagonal: Similar to the rule of thirds overlay, the diagonal overlay is most useful for cropping images with clearly expressed perspective, i.e. in images where you can easily draw diagonals stretching from or toward the focal objects.
Triangle: This overlay can help improve the composition of images with uneven diagonals. Focal objects can be placed at the tips of the triangles or go along the diagonal lines of the overlay.
Golden ratio: Similar to the rule of thirds but a more center-focused overlay. It can be used to bring out sceneries or objects into the line of sight of a photo.
Golden spiral: Can be used for balancing out images that feature curving or sweeping lines, with the focus being at the center of the spiral.
Center: You can use the center overlay to achieve symmetry or to make sure the verticals or horizontals in an image go right through the image center.
To shift the direction of the golden spiral or triangle crop overlays, press + + on your keyboard.
To cycle through the crop overlays, press + on your keyboard.
Show or hide crop overlay
In the Overlay pop-up menu, you can also choose when the crop overlay will be displayed:
- Auto Show Overlay: Only shows overlay as you're dragging the crop box handles.
- Always Show Overlay: The selected or last-used overlay is visible whenever the Crop gets activated.
- Never Show Overlay: Turns off overlay completely.

