Table of Contents
Create a new image
To create a new image in Pixelmator Pro, you can use any of more than 400 ready-made templates and mockups, choose from a number of image size presets, or create an image from scratch by entering custom dimensions.
Create an image from a template or mockup
Give a beautiful start to your designs using over 400 templates for social media, print, and more, or showcase your designs in real-life scenarios with device and print mockups.
- To open Pixelmator Pro, click the Pixelmator Pro icon in the Dock, Launchpad, or the Applications folder.
Do one of the following:
- In the Pixelmator Pro Welcome screen (shown below), click "Create a new document".
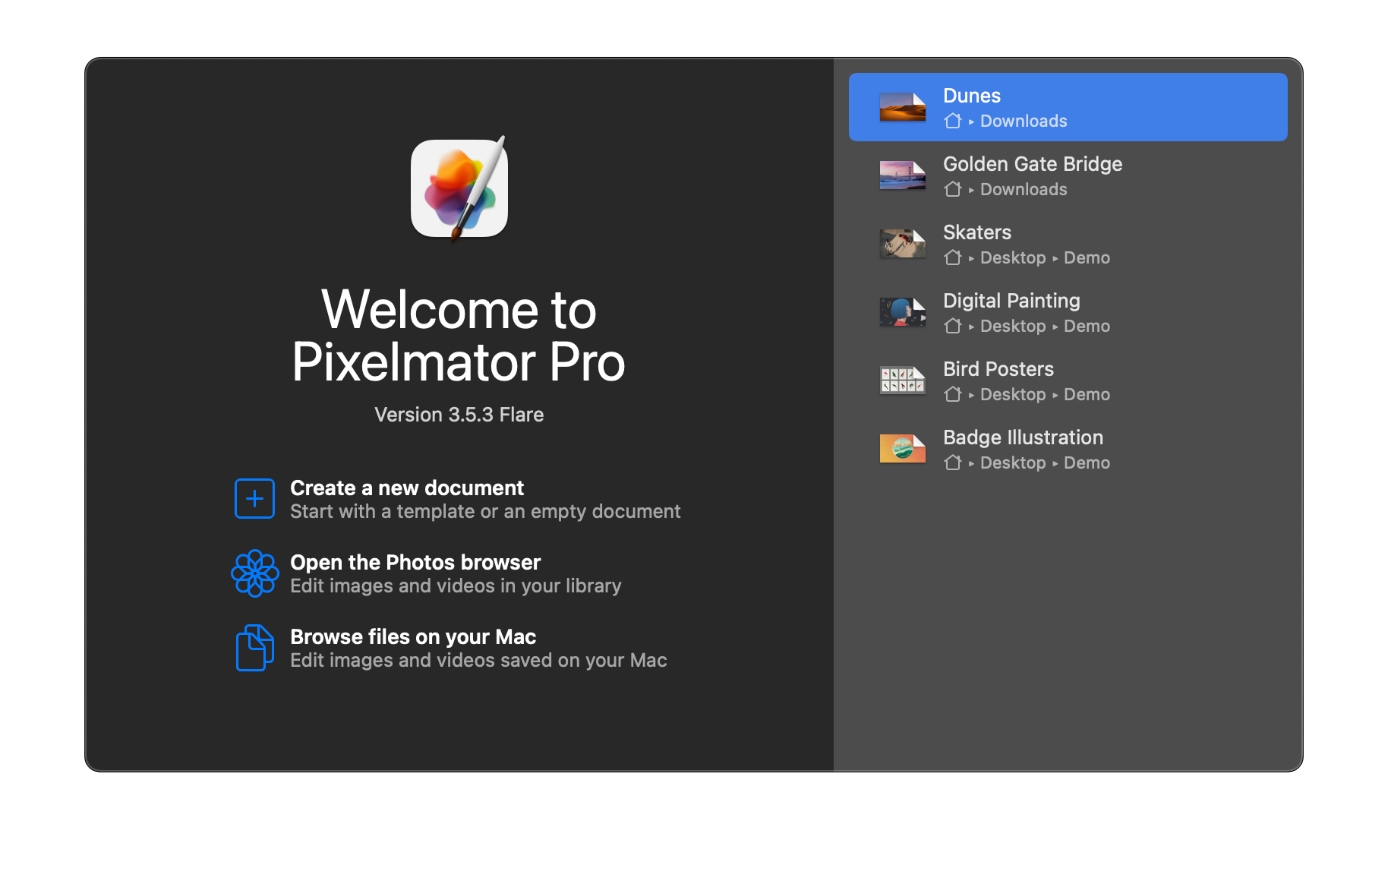 If the Welcome screen doesn't show up, choose Window > Welcome to Pixelmator Pro (from the Window menu at the top of the screen). You can also press + + on your keyboard.
 - Choose File > New (from the File menu at the top of your screen).
- – click the Pixelmator Pro icon in the Dock and choose New.
In the template browser, browse the different template and mockup categories to find the design you like, then double-click its thumbnail to open it.
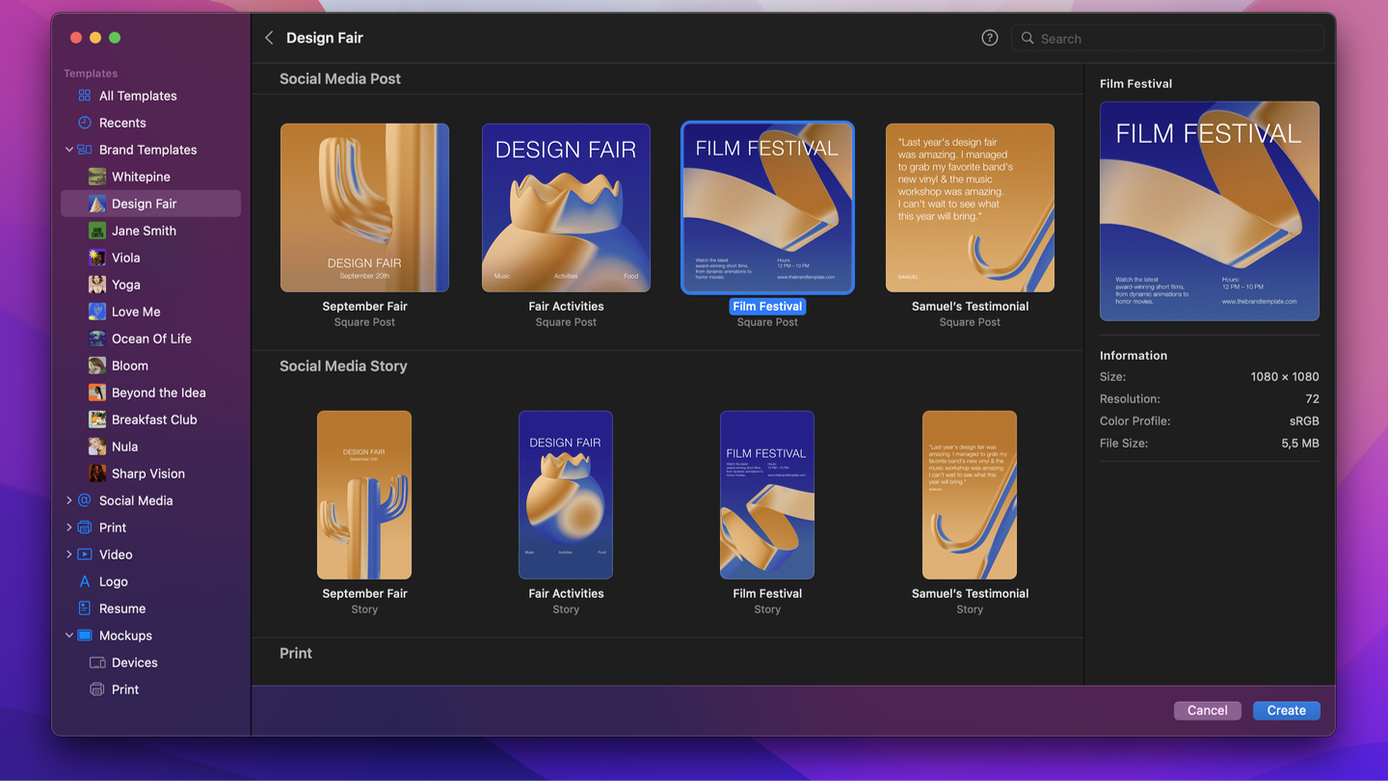
You can search for templates by name or type in keywords to show all related templates and mockups.
Create an image using an image size preset
If you're looking to create a new blank image for a specific purpose, you can choose from a range of image size presets for web, photo, print, device, or more.
- To open Pixelmator Pro, click the Pixelmator Pro icon in the Dock, Launchpad, or the Applications folder.
Do one of the following:
- In the Pixelmator Pro Welcome screen, click "Create a new document". If the Welcome screen doesn't show up, choose Window > Welcome to Pixelmator Pro (from the Window menu at the top of the screen). You can also press + + on your keyboard.
- Choose File > New (from the File menu at the top of your screen).
- – click the Pixelmator Pro icon in the Dock and choose New.
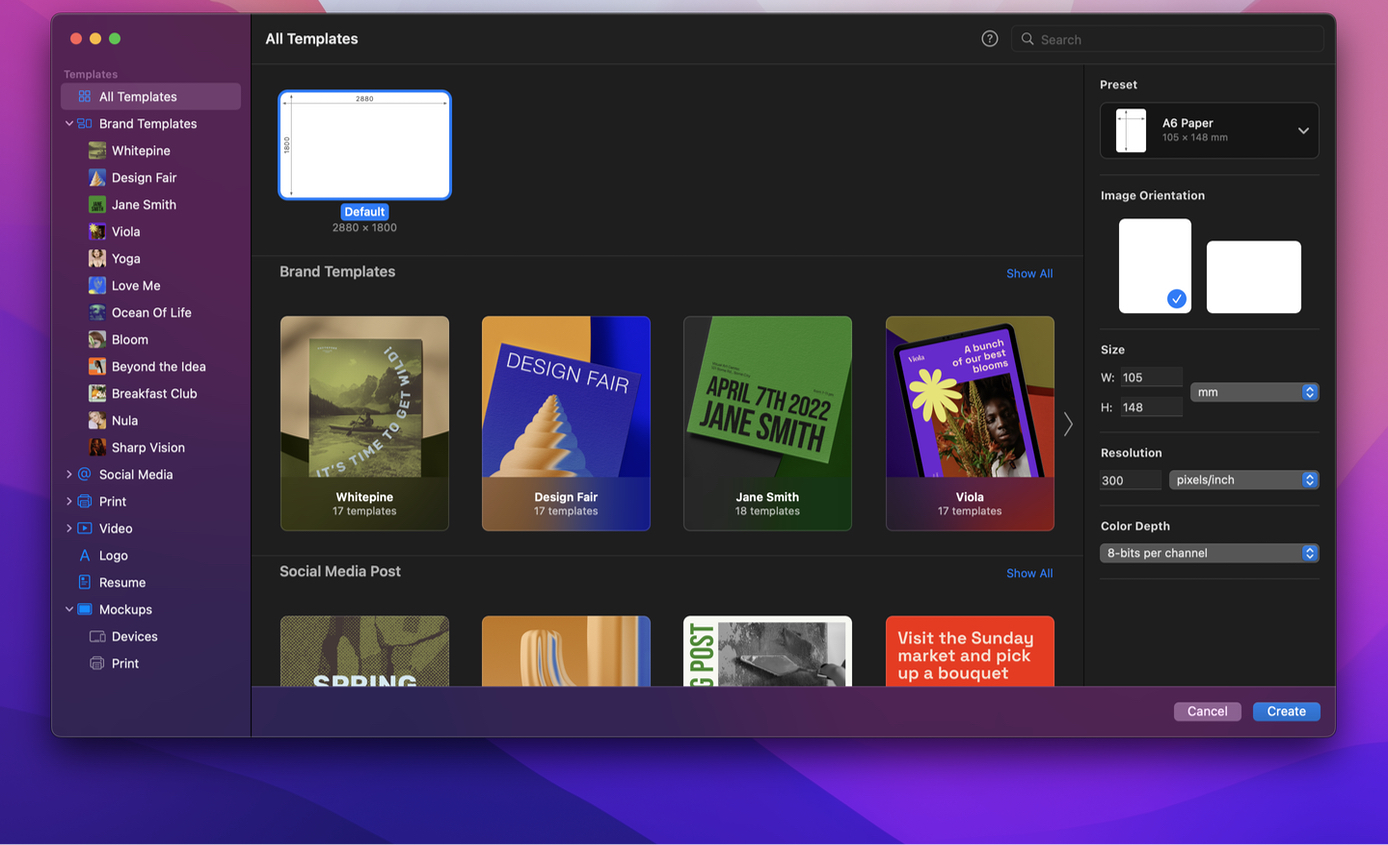
In the template browser, click All Templates then click the Preset pop-up menu in the sidebar on the right to open the preset browser.
Browse the different preset categories to find the template size you need. You'll find the following preset categories: International Paper, US Paper, Photo, Web, Social, Film & Video, Iconography, and Devices.
When you select a preset, you can also change the document orientation — portrait or landscape — in the sidebar on the right.
Click Create or press the key to create a new document.
To create a new custom image size preset:
- In Pixelmator Pro, choose File > New (from the File menu at the top of your screen).
- Enter your new image dimensions.
- Open the preset browser in the sidebar on the right, then click
 to save a new preset.
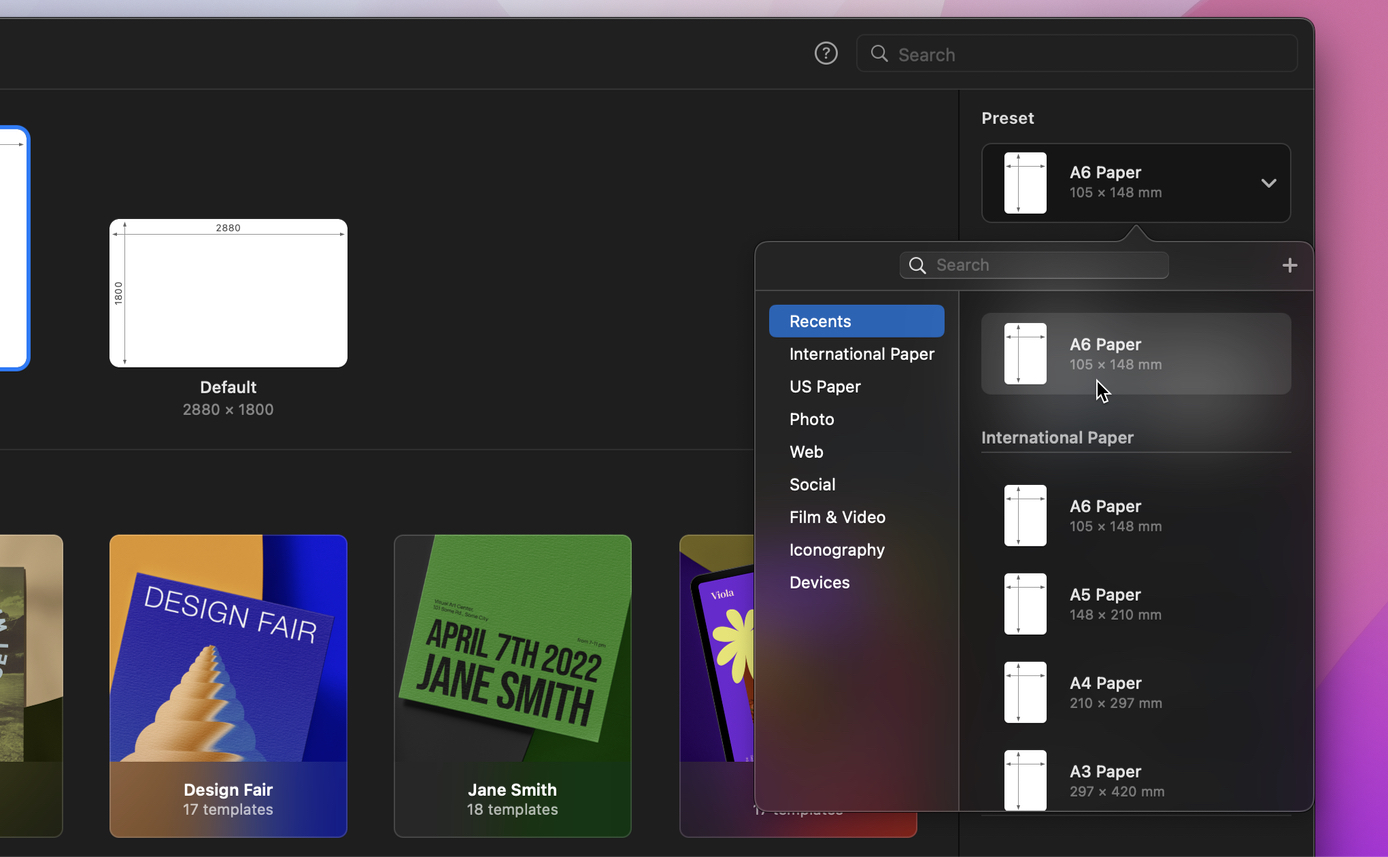
If you don’t want to keep the new preset, – click it in the preset browser and choose Remove. In the same menu, you can also rename, duplicate, redefine, or reset templates.
Create an image with a custom size
- To open Pixelmator Pro, click the Pixelmator Pro icon in the Dock, Launchpad, or the Applications folder.
- Do one of the following:
- In the Pixelmator Pro Welcome screen, click Create an empty new document. If the Welcome screen doesn't show up, choose Window > Welcome to Pixelmator Pro (from the Window menu at the top of the screen.)
- Choose File > New (from the File menu at the top of your screen).
- – click the Pixelmator Pro icon in the Dock and choose New.
- In the sidebar on the right, choose the document orientation or choose the measurement units, resolution, and color depth from the pop-up menus.
- Enter the width, height, and resolution of the image, or change the color depth or image orientation.
- Click Create or press the key to create a new document.
Create an image from the clipboard
The new image will be created using the image you have saved to the clipboard. The clipboard is a macOS feature that contains the last thing you copied on your Mac — if it’s an image, the clipboard option will appear in the template browser. If it's text or something else, that option will not be shown.
On your Mac, iPhone, or iPad, copy an image to Clipboard.
Open Pixelmator Pro by clicking the Pixelmator Pro icon in the Dock, Launchpad, or the Applications folder.
Do one of the following:
- In the Pixelmator Pro Welcome screen, click Create a new document. If the Welcome screen doesn't show up, choose Window > Welcome to Pixelmator Pro (from the Window menu at the top of the screen.)
- Choose File > New (from the File menu at the top of your screen).
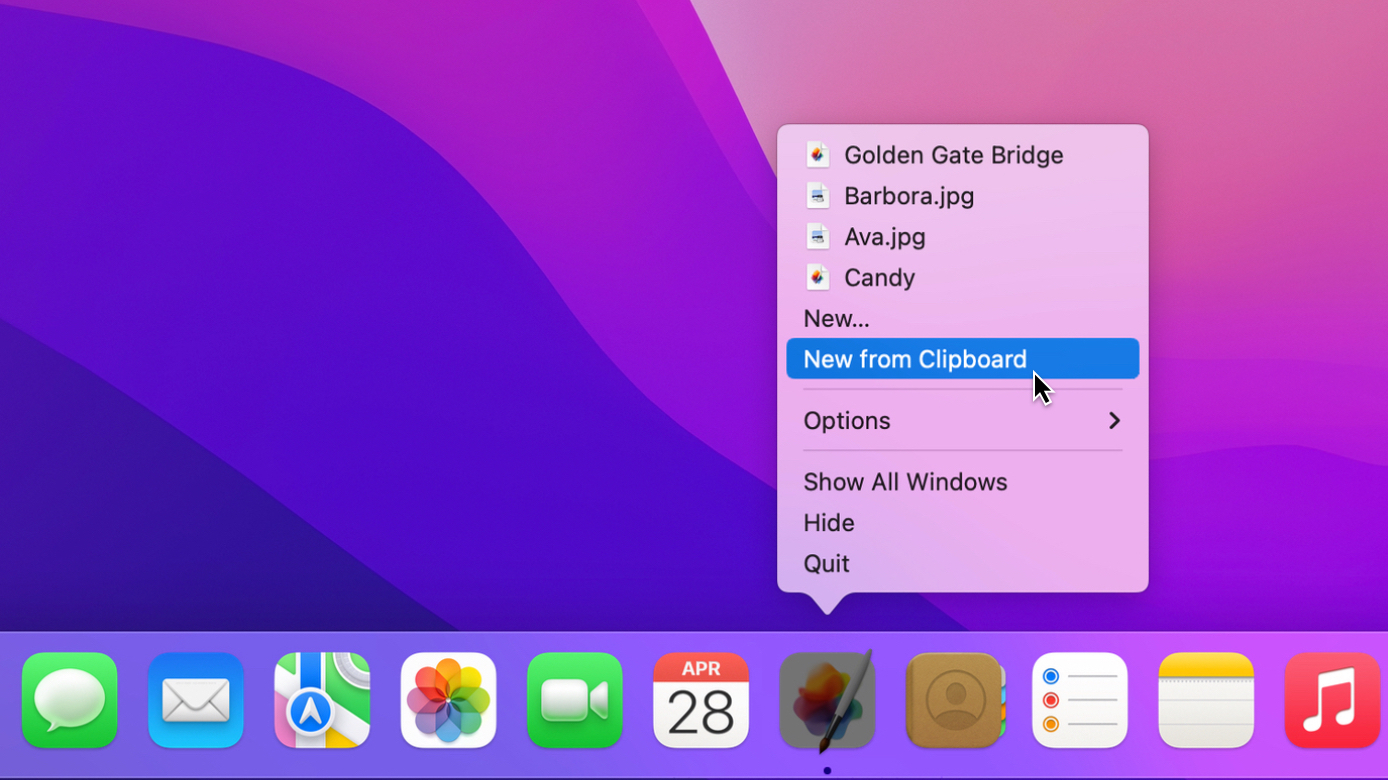
- – click the Pixelmator Pro icon in the Dock and choose New From Clipboard.
- In the template browser, choose the Clipboard option.
- Click Create or press the key.
And, with Universal Clipboard, you can even copy media on one Apple device and create a new document in Pixelmator Pro on another.


