Table of Contents
Edit a brush
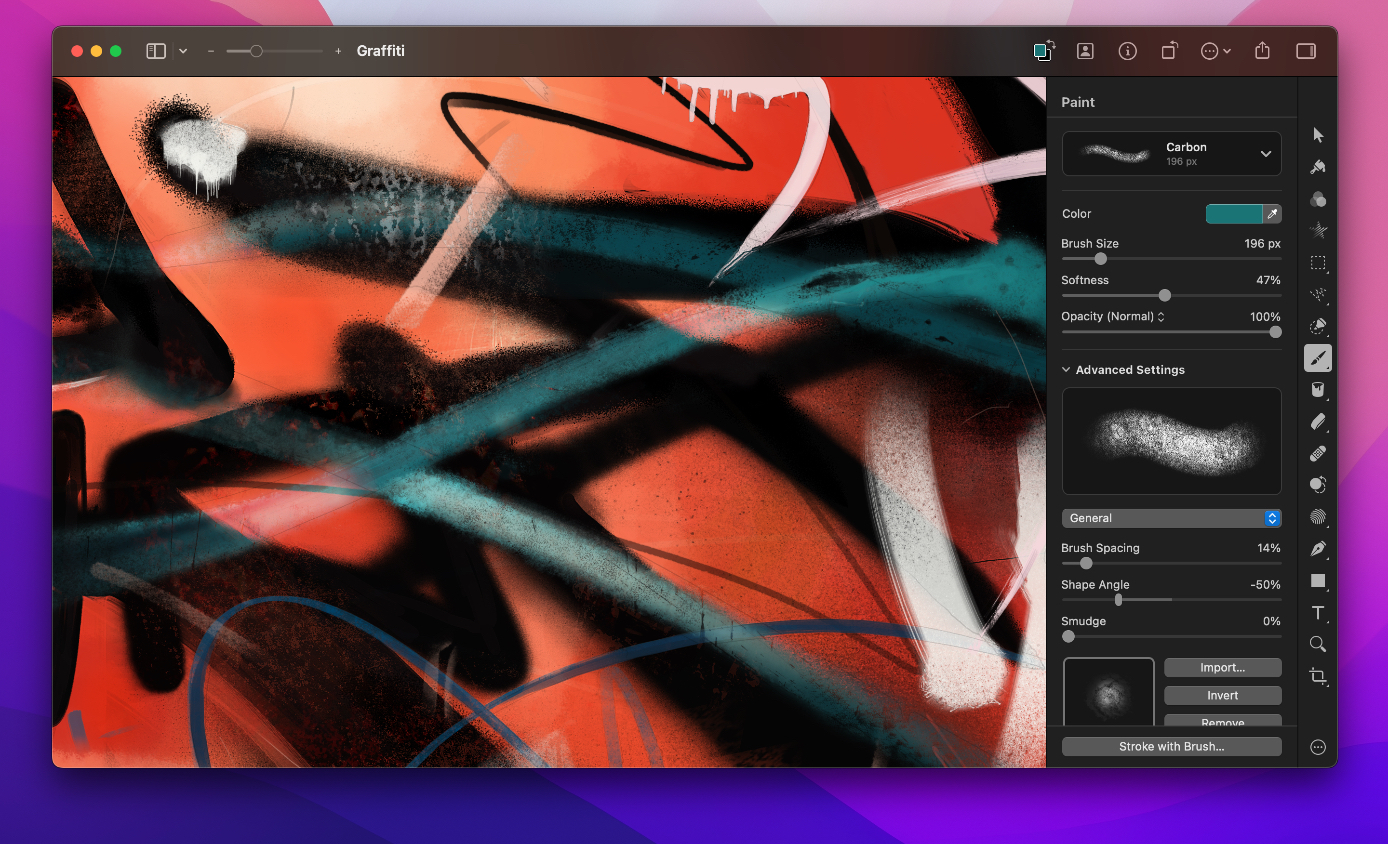
Each brush in Pixelmator Pro has a range of settings that can be modified to change the way the brush paints. The settings for the Paint tool let you quickly adjust the size, softness, opacity, blend mode, and color. The additional specifications like the brush grain spacing, shape direction, and others can be found in the Advanced Settings menu.
Choose a brush to edit
Choose the Paint tool by doing one of the following:
- Click
 in the
Tools sidebar or choose it from the
grouped tools.
in the
Tools sidebar or choose it from the
grouped tools. - Choose Tools > Paint (from the Tools menu at the top of your screen).
- Press the key on your keyboard.
- Click
At the top of the Tool Options pane, click the name of the current brush to open the Brushes Browser and select a brush you'd like to edit.
Edit the brush settings:
Color: Click the color well in the Tool Options pane and choose a color or click
 to pick a color from the image.
Brush Size: Drag the Brush Size slider to adjust the size of the brush.
Softness: Drag the Softness slider to adjust the softness of the edges of the brush.
Opacity: Drag the Opacity slider to adjust the transparency of the brush.
To edit advanced brush settings, expand the Advanced Settings menu below.
Edit the general brush settings
After choosing a brush to edit, under Advanced Settings, click the brush settings pop-up menu and choose General.
Customize the general brush settings:
Brush Spacing: Drag the Brush Spacing slider to adjust the spacing between individual brush marks within the brush.
Shape Angle: Drag the Shape Angle slider to adjust the angle of the brush shape.
Smudge: Drag the Smudge slider to adjust the intensity of the paint smudging effect.
Shape: Click Import to choose an image of the desired shape from your device or drag it directly to the Shape well. Down is the default forward direction, so to create a directional brush, make sure to orient the shape downward.
Grain: Click Import to choose an image of the desired grain from your device or drag it directly to the Grain well.
Smooth Textures: Select Smooth Textures to smooth the textures of the brush.
Merge Brush Marks: Select Merge Brush Marks to make individual brush marks merge together instead of building up.
Wetness: Select to enable the wet paint effect.
Once you're satisfied with your changes, click Done to finish customizing the brush. Alternatively, click Reset Brush to reset all the settings of the brush to default.
Edit the shape settings of a brush
- After choosing a brush to edit, under the Advanced Settings, click the brush settings pop-up menu and choose Shape.
Customize the following brush settings:
Shape Direction: Move the Shape Direction slider to adjust how closely the brush shape texture should follow your painting direction.
At -100%, the angle of a brushstroke’s each internal brush mark is fixed. At 100%, the brush marks are rotated to follow your painting direction completely.
Scale Shape Horizontally: Move this slider to adjust the horizontal size of the brush shape.
Scale Shape Vertically: Move this slider to adjust the vertical size of the brush shape.
Initial Direction: Choose an initial direction for the brush shape:
- Fixed — The brushstroke’s first brush mark is fixed at its original position.
- Random — The brushstroke’s first brush mark is placed at a random angle.
- Directed — The brushstroke’s first brush mark follows your initial painting direction.
Note: These settings combine with the Shape Direction setting. For example, with Random as the Initial Direction and the Shape Direction setting at 0%, the first brush mark is placed at a random angle and every subsequent brush mark is placed at that same angle. With Random as the Initial Direction and the Shape Direction setting at 100%, the first brush mark is placed at a random angle and every subsequent brush mark is rotated according to your painting direction relative to the original (random) angle.
Edit the grain settings of a brush
- After choosing a brush to edit, under the Advanced Settings, click the brush settings pop-up menu and choose Grain.
Customize the following grain settings:
Grain Spacing: Move the Grain Spacing slider to adjust how closely the brush texture marks should be placed inside your brushstroke.
Grain Scale: Move the Grain Scale slider to adjust the size of the brush texture.
Grain Rotation: Move the Grain Scale slider to adjust the angle of the brush texture.
Edit the stroke settings of a brush
- After choosing a brush to edit, under the Advanced Settings, click the brush settings pop-up menu and choose Stroke.
Customize the following stroke settings:
Tail Start Dynamics: Move the Tail Start Dynamics slider to adjust how much the size and opacity of a brushstroke’s beginning should be reduced.
Tail End Dynamics: Move the Tail End Dynamics slider to adjust how much the size and opacity of a brushstroke’s end should be reduced.
Tail Opacity: Move the Tail Opacity slider to adjust how much the opacity of the brushstroke’s beginnings and ends should be reduced. At 100%, the opacity will not be reduced at all and at 0%, the opacity will be reduced to 0%.
Tail Size: Move the Tail Opacity slider to adjust how much the size of the brushstroke’s beginnings and ends should be reduced.
Edit the dynamic settings of a brush
- After choosing a brush to edit, under the Advanced Settings, click the brush settings pop-up menu and choose Dynamics.
Customize the following dynamic settings:
Opacity by Speed: Move the Opacity by Speed slider to adjust how much the opacity of the brushstroke should increase or decrease according to how quickly you paint. With a positive value, painting more quickly will reduce opacity and with a negative one, painting more quickly will increase opacity.
Size by Speed : Move the Size by Speed slider to adjust how much the size of the brushstroke should increase or decrease according to how quickly you paint. With a positive value, painting more quickly will reduce the size and with a negative one, painting more quickly will increase it.
Edit the scatter settings of a brush
- After choosing a brush to edit, under the Advanced Settings, click the brush settings pop-up menu and choose Scatter.
Customize the following scatter settings:
Brush Scatter: Move this slider to adjust how much each brush mark should be scattered away from the brushstroke.
Angle Scatter: Move this slider to adjust how much to randomly vary the angle of each brush mark in a brushstroke.
Size Scatter: Move this slider to adjust how much to randomly vary the size of each brush mark in a brushstroke.
Opacity Scatter: Move this slider to adjust how much to randomly vary the opacity of each brush mark in a brushstroke.
Hue Scatter: Move this slider to adjust how much to randomly vary the hue of each brush mark in a brushstroke.
Saturation Scatter: Move this slider to adjust how much to randomly vary the saturation of each brush mark in a brushstroke.
Lightness Scatter: Move this slider to adjust how much to randomly vary the lightness of each brush mark in a brushstroke.
Edit the graphics tablet settings of a brush
- After choosing a brush to edit, under the Advanced Settings, click the brush settings pop-up menu and choose Pressure.
Customize the following graphics tablet settings:
Size by Pressure: Adjust how much the size of the brushstroke should change according to the pressure you apply while painting using a graphics tablet.
Opacity by Pressure: Adjust how much the opacity of the brushstroke should change according to the pressure you apply while painting using a graphics tablet.
Angle by Tilt: Adjust how much the angle of the brushstroke should change according to the way you tilt your pen while painting using a graphics tablet.
Scare Horizontally by Tilt: Adjust how much the horizontal size of the brushstroke should change according to the way you tilt your pen while painting using a graphics tablet.
Scare Vertically by Tilt: Adjust how much the vertical size of the brushstroke should change according to the way you tilt your pen while painting using a graphics tablet.

