Table of Contents
Apply halftone effects
The effects in the Halftone category apply artistic halftone screen patterns to your selected layer.
Apply a Halftone effect to an image
Halftone effects can be applied directly to a single layer or, using an effects layer, to multiple layers in a composition.
To add Halftone effect to the currently selected layer, do one of the following:
- Choose Format > Effects > Halftone (from the Format menu at the top of your screen) and choose the Halftone effect you want.
- Click
 in the
Tools sidebar, then click Add Effect and add the Halftone effect you want.
in the
Tools sidebar, then click Add Effect and add the Halftone effect you want. - Press on your keyboard, click Add Effect and add the Halftone effect you want.
To apply Halftone effect to multiple layers in a composition using an effects layer (all layers below this layer will be affected):
- Choose Insert > Effects (from the Insert menu at the top of your screen), click Add Effect in the Tool Options pane and add the Halftone effect you want.
- Click
 at the top of the
Layers sidebar, choose Effects, click Add Effect in the Tool Options pane and add the Halftone effect you want.
at the top of the
Layers sidebar, choose Effects, click Add Effect in the Tool Options pane and add the Halftone effect you want. - Press + + on your keyboard, click Add Effect in the Tool Options pane and add the Halftone effect you want.
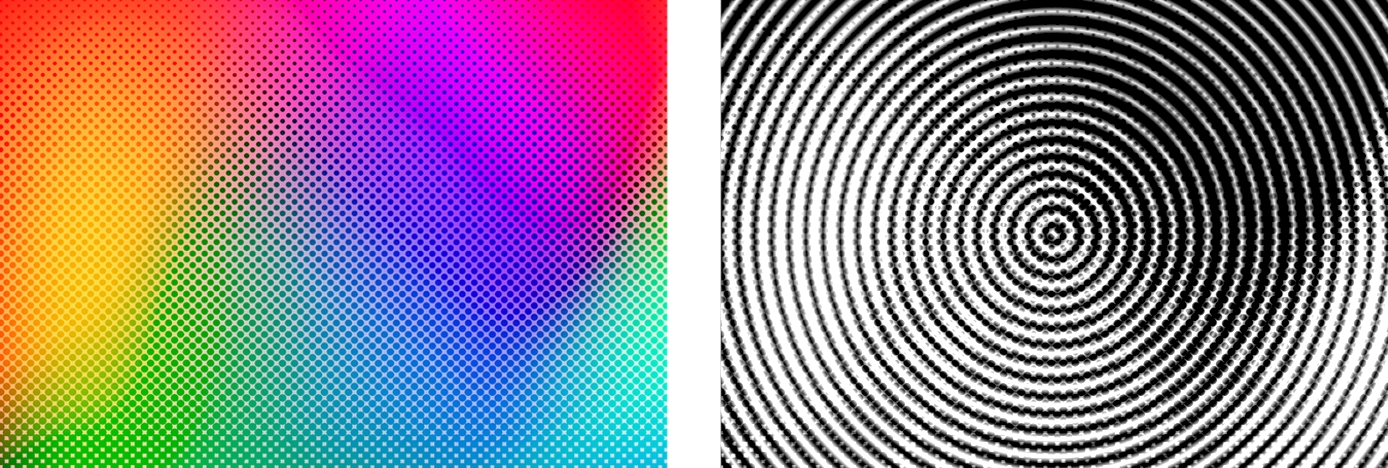
Apply a Circular Screen effect
The Circular Screen effect adds a circular black and white halftone pattern over your selected layer.
Customize the effect:
Move the Width slider to adjust the distance between each circle in the pattern. You can also enter a value from 2.0 px to 50.0 px.
Move the Sharpness slider to adjust the sharpness of the circles. You can also enter a value from 0% to 100%.
Move the handles of the effect rope to adjust the position of the screen. If the effect rope isn’t visible, click the rope button in the Tool Options pane.
Show Original: Click the Show Original button or press + on your keyboard to see what the image looks like without any effects.
Show Split Comparison: – click the Show Original button, press + on your keyboard, or force click the canvas.
To reset all effects, click Reset at the bottom of the Tool Options pane.
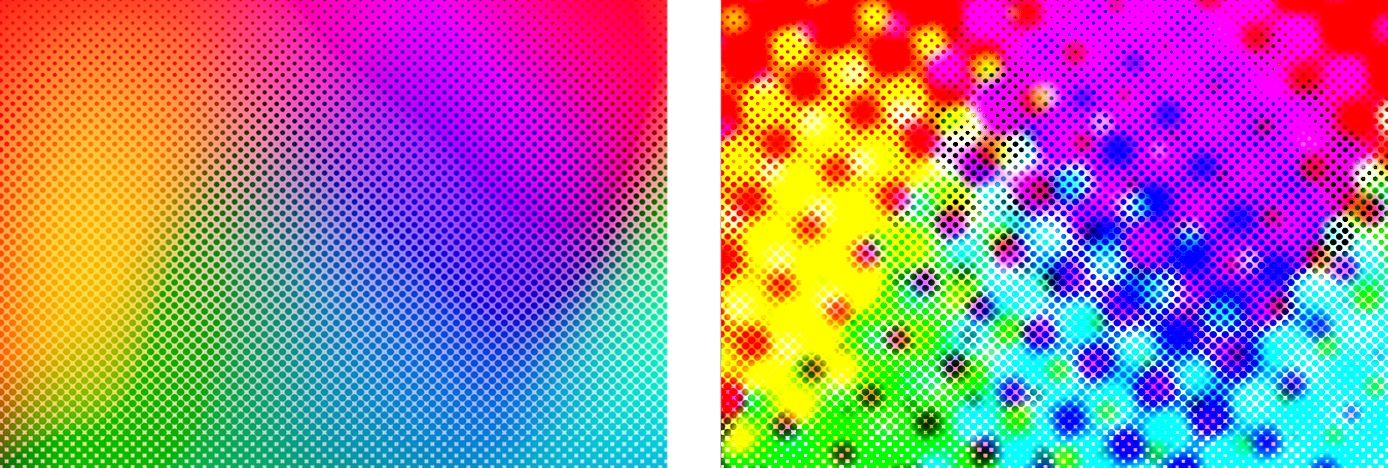
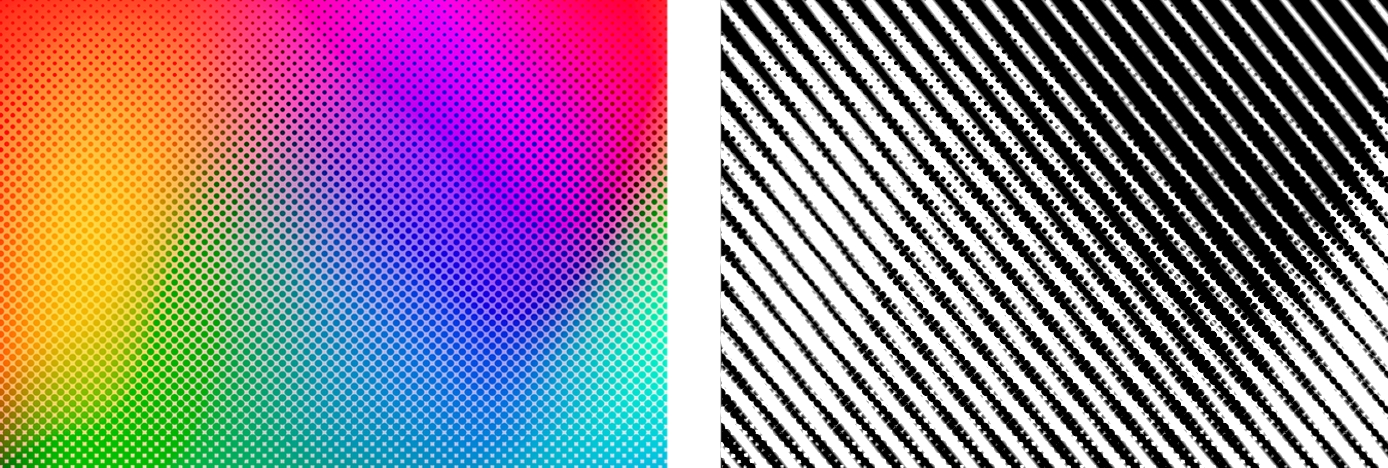
Apply a CMYK Halftone effect
The CMYK Halftone effect recreates the selected layer using red, yellow, magenta, and black on a white background, making it look as if the image was printed using the halftone printing technique.
Customize the effect:
Move the Width slider to adjust the size of each dot in the pattern. You can also enter a value from 2.0 px to 100.0 px.
Move the Angle wheel to adjust the angle of the pattern. You can also enter a value from 0.0º to 359.9º.
Move the Sharpness slider to adjust the sharpness of the dots. You can also enter a value from 0% to 100%.
Move the Gray Component Replacement slider to adjust how grays are created — either with a mix of cyan, magenta, and yellow or two of the primary colors and black.
Move the Under Color Removal slider to adjust how much of any near-black areas are replaced with pure black ink.
Move the handles of the effect rope to adjust the position of the screen. If the effect rope isn’t visible, click the rope button in the Tool Options pane.
Show Original: Click the Show Original button or press + on your keyboard to see what the image looks like without any effects.
Show Split Comparison: – click the Show Original button, press + on your keyboard, or force click the canvas.
To reset all effects, click Reset at the bottom of the Tool Options pane.
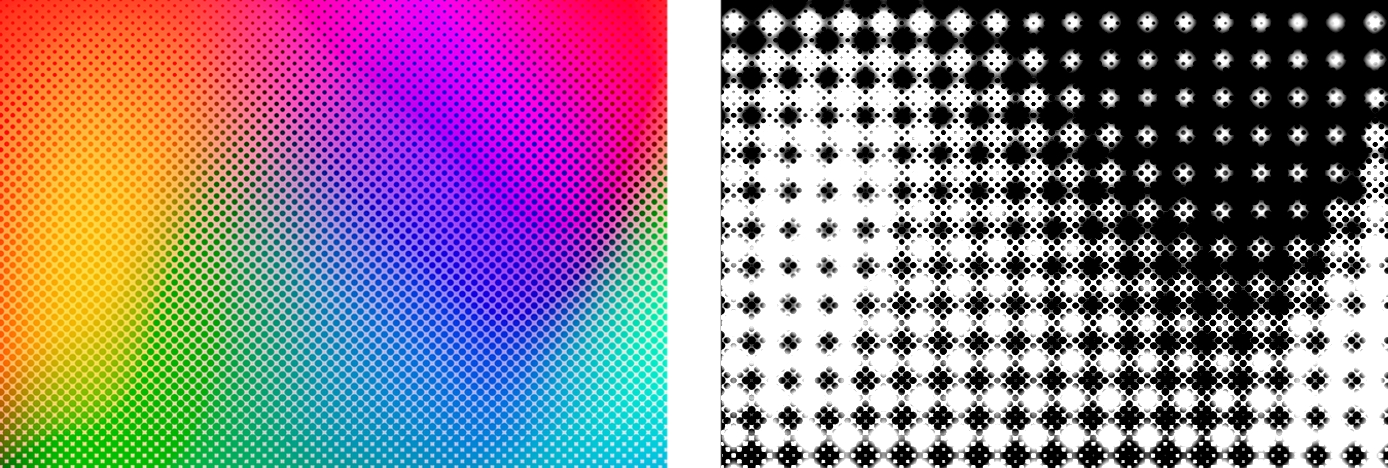
Apply a Dot Screen effect
The Dot Screen effect recreates your selected layer using the black and white dots of a halftone screen.
Customize the effect:
Move the Angle wheel to adjust the angle of the pattern. You can also enter a value from 0.0º to 359.9º.
Move the Width slider to adjust the size of each dot in the pattern. You can also enter a value from 2.0 px to 50.0 px.
Move the Sharpness slider to adjust the sharpness of the dots. You can also enter a value from 0% to 100%.
Move the handles of the effect rope to adjust the position of the screen. If the effect rope isn’t visible, click the rope button in the Tool Options pane.
Show Original: Click the Show Original button or press + on your keyboard to see what the image looks like without any effects.
Show Split Comparison: – click the Show Original button, press + on your keyboard, or force click the canvas.
To reset all effects, click Reset at the bottom of the Tool Options pane.
Apply a Hatched Screen effect
The Hatched Screen effect recreates your selected layer using a hatched black and white halftone screen.
Customize the effect:
Move the Angle wheel to adjust the angle of the pattern. You can also enter a value from 0.0º to 359.9º.
Move the Width slider to adjust the size of each line in the pattern. You can also enter a value from 2.0 px to 50.0 px.
Move the Sharpness slider to adjust the sharpness of the lines. You can also enter a value from 0% to 100%.
Move the handles of the effect rope to adjust the position of the screen. If the effect rope isn’t visible, click the rope button in the Tool Options pane.
Show Original: Click the Show Original button or press + on your keyboard to see what the image looks like without any effects.
Show Split Comparison: – click the Show Original button, press + on your keyboard, or force click the canvas.
To reset all effects, click Reset at the bottom of the Tool Options pane.
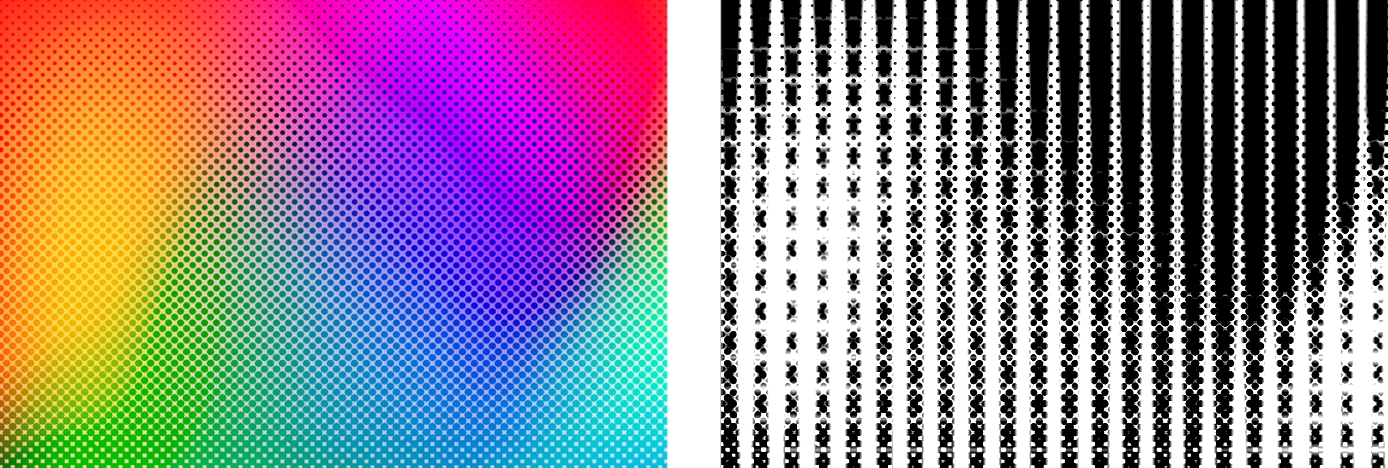
Apply a Line Screen effect
The Line Screen effect recreates your selected layer using a black and white line screen.
Customize the effect:
Move the Angle wheel to adjust the angle of the pattern. You can also enter a value from 0.0º to 359.9º.
Move the Width slider to adjust the size of each line in the pattern. You can also enter a value from 2.0 px to 50.0 px.
Move the Sharpness slider to adjust the sharpness of the lines. You can also enter a value from 0% to 100%.
Move the handles of the effect rope to adjust the position of the screen. If the effect rope isn’t visible, click the rope button in the Tool Options pane.
Show Original: Click the Show Original button or press + on your keyboard to see what the image looks like without any effects.
Show Split Comparison: – click the Show Original button, press + on your keyboard, or force click the canvas.
To reset all effects, click Reset at the bottom of the Tool Options pane.