Table of Contents
Change the blend mode of a layer
Blend modes determine how layers mix or combine with any visible layers below them. More accurately, they determine how the colors of layers blend with any other colors underneath them. Blend modes can be used to create striking artistic effects, retouch images, and a whole lot more.
You can choose blend modes in a few different places in Pixelmator Pro. One of the most basic uses is changing the blend mode of an entire layer. By default, layers have the Normal blend mode and 100% Opacity. This means that, if an entirely blue layer is above an entirely red layer of identical shape and size, all you see is the blue layer. If you change the blend mode, the blue object will be combined with the red object according to the blend mode.
You can also change the blend mode of certain tools, like the Color Fill tool, so when you fill an area, the color you fill is blended with the colors of the layer you’re filling.
Change the blend mode of a layer
- Select the layer or layers you would like to edit.
- Choose the Style tool by doing one of the following:
- Click
 in the
Tools sidebar.
in the
Tools sidebar. - Choose Tools > Style (from the Tools menu at the top of your screen).
- Press the key on your keyboard.
- Click
- Click the Blend Mode pop-up menu — the words "Opacity (Normal)" — in the Tool Options pane and choose a blend mode.
You can also quickly change the blend mode and layer opacity in the Layers sidebar.
Types of blend modes
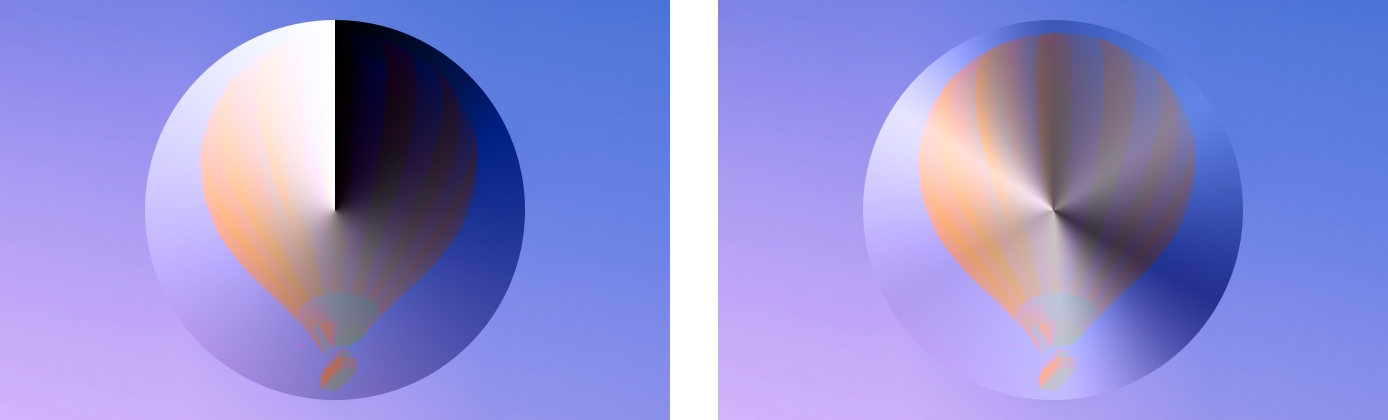
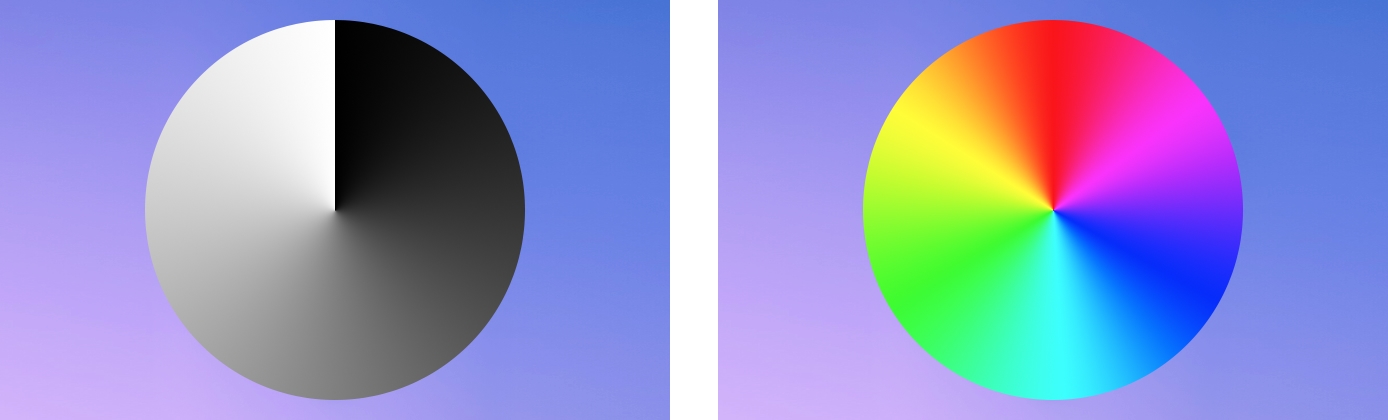
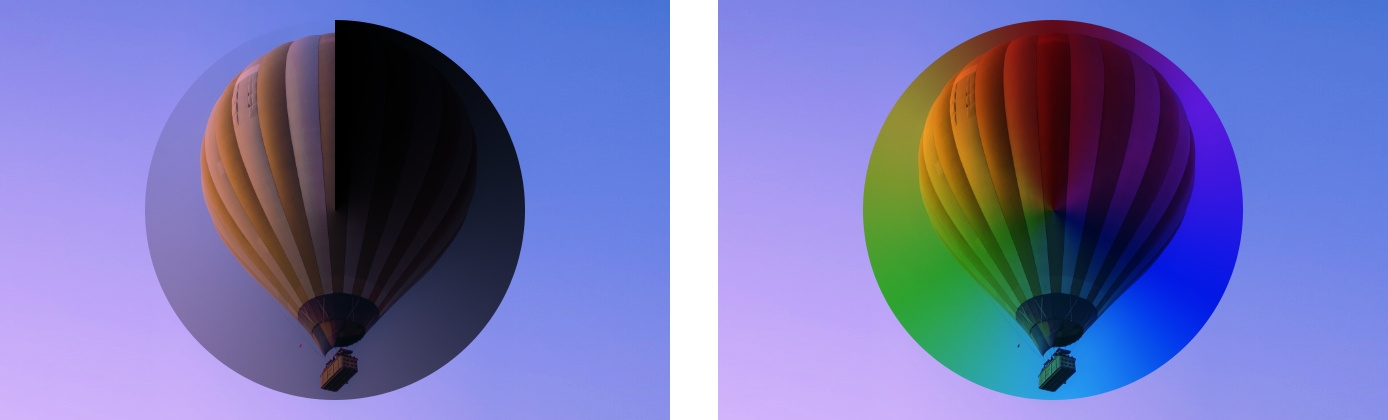
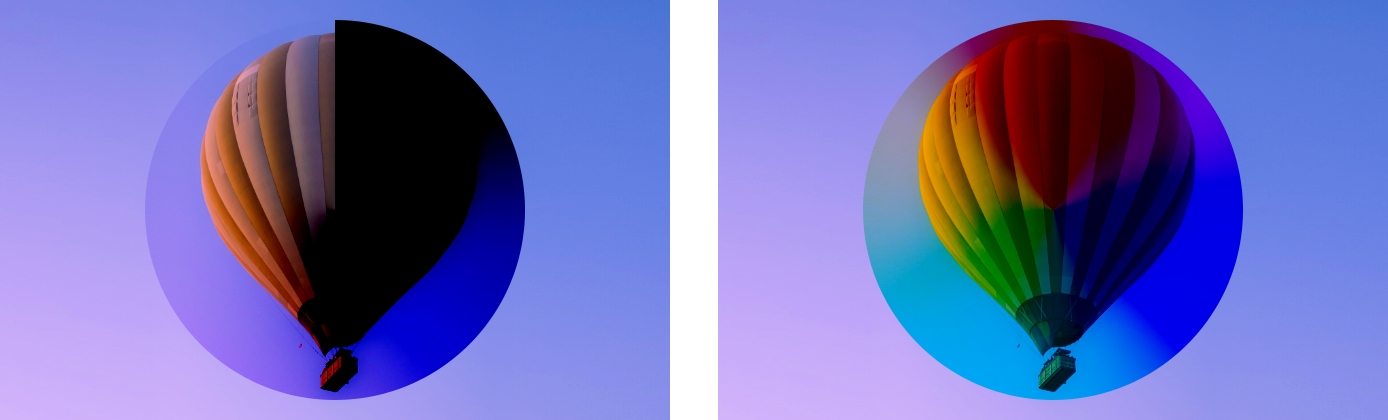
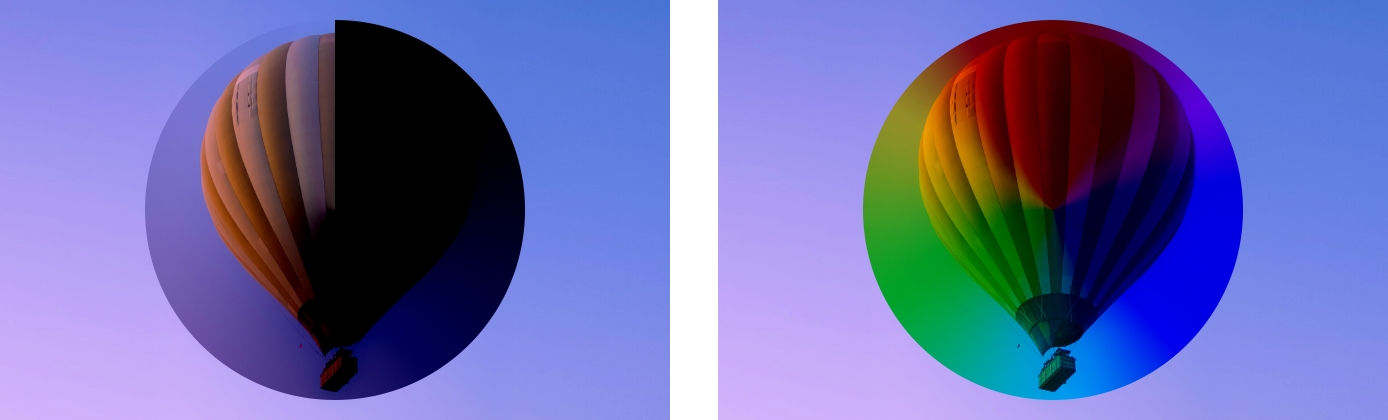
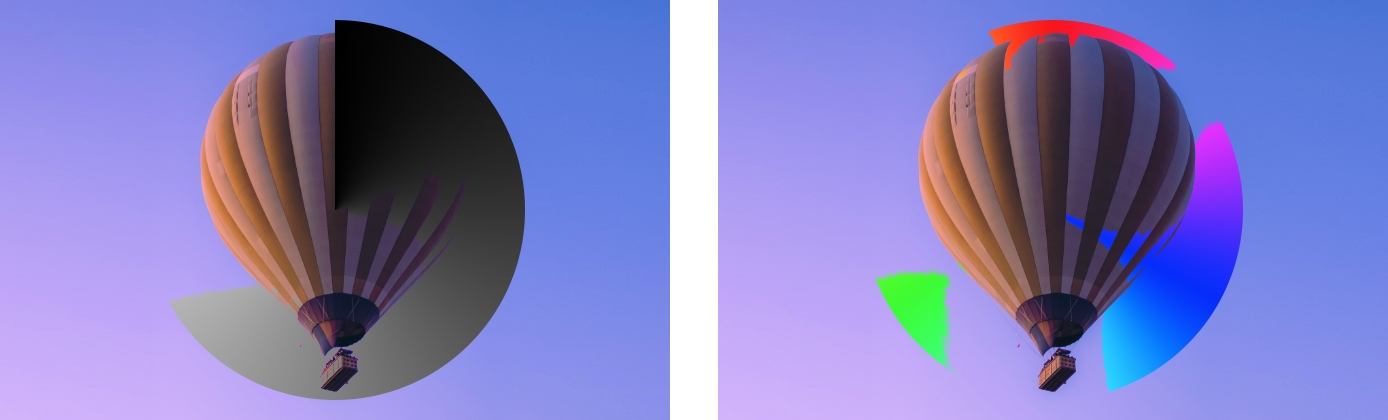
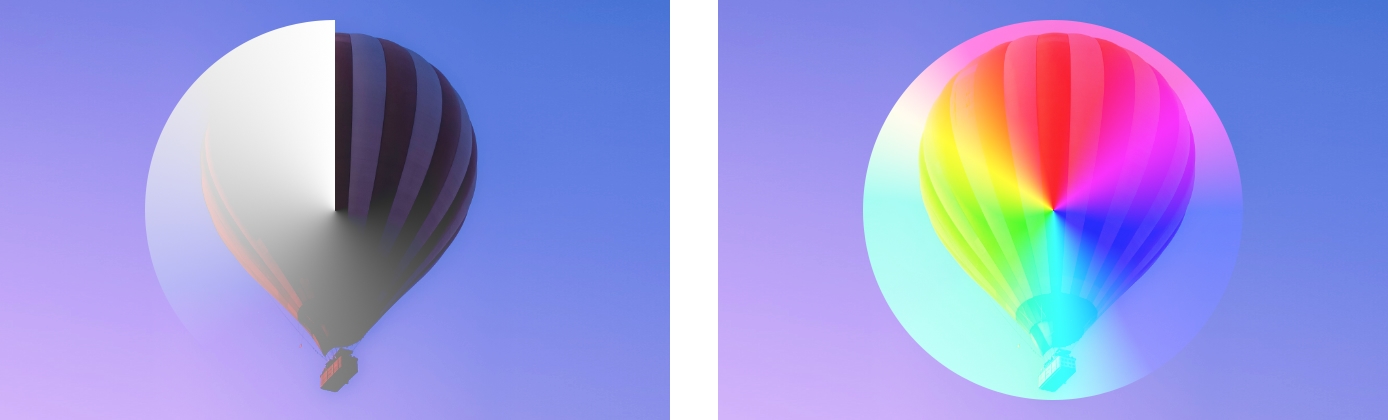
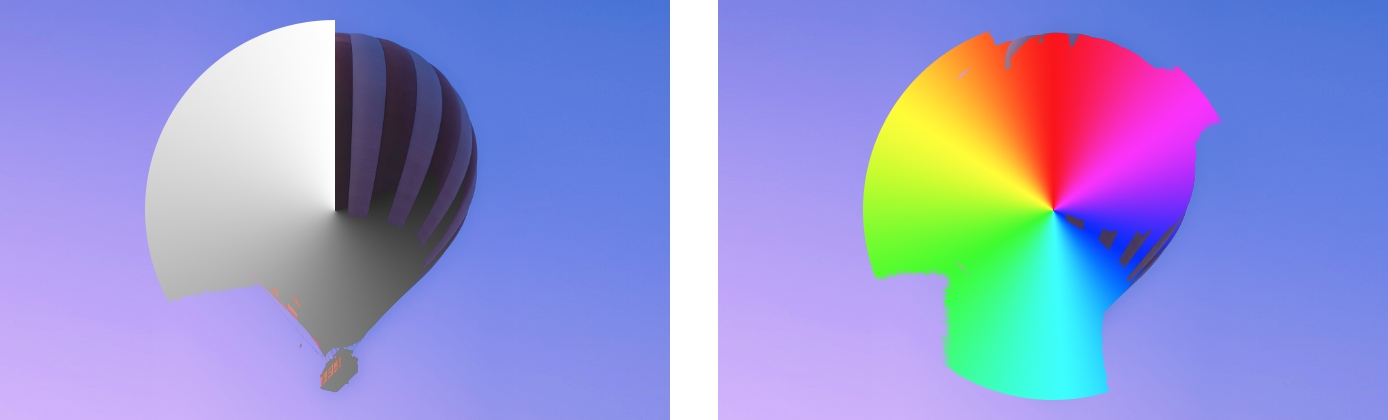
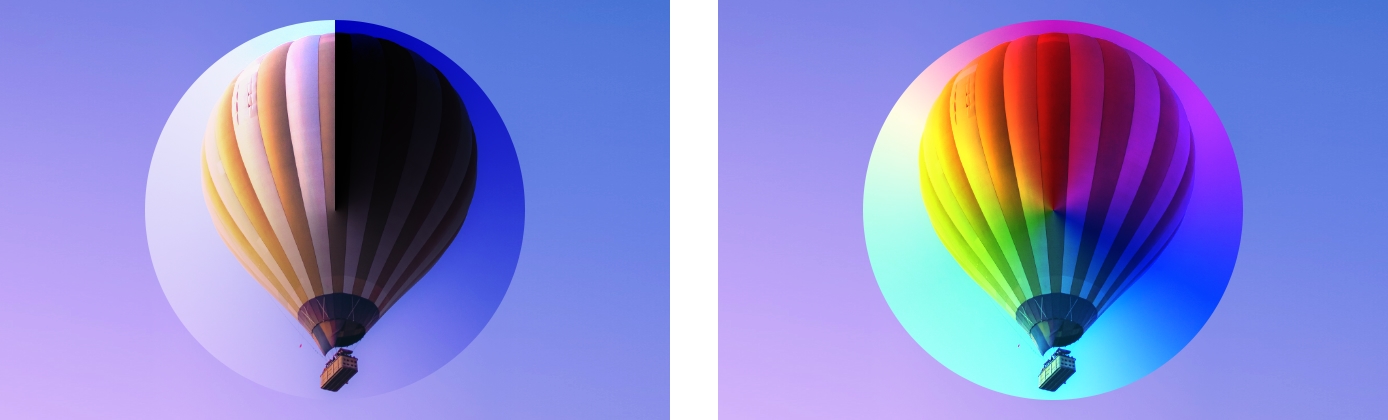
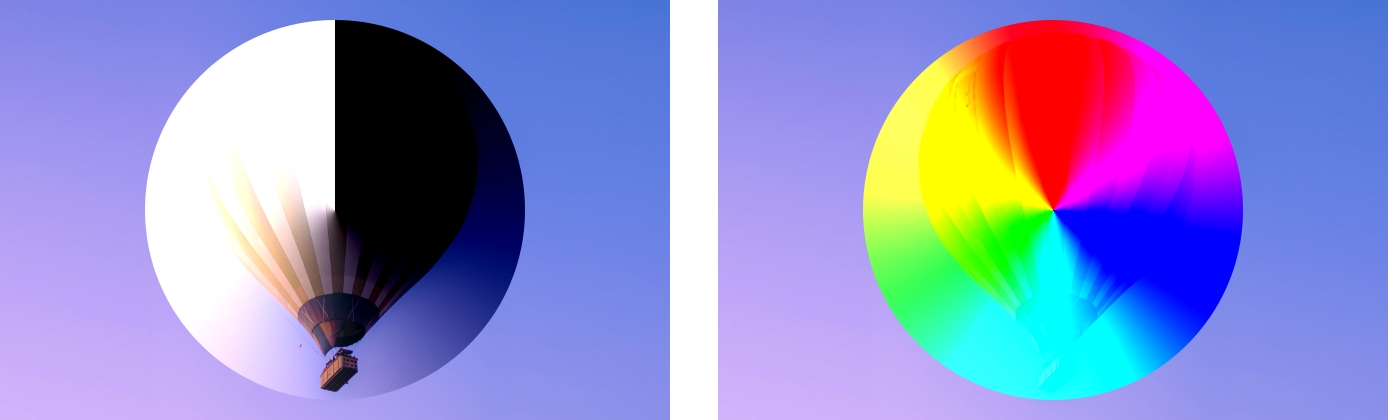
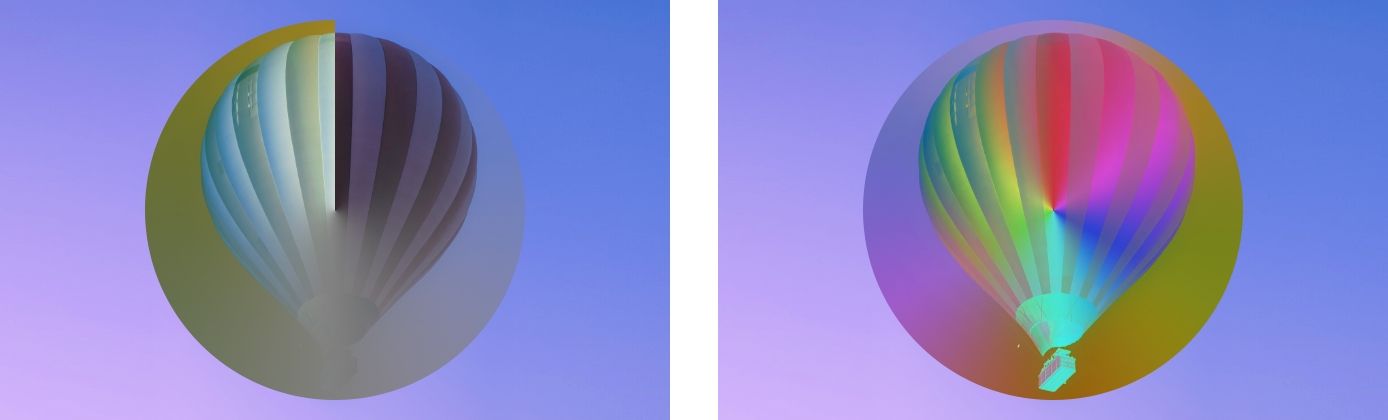
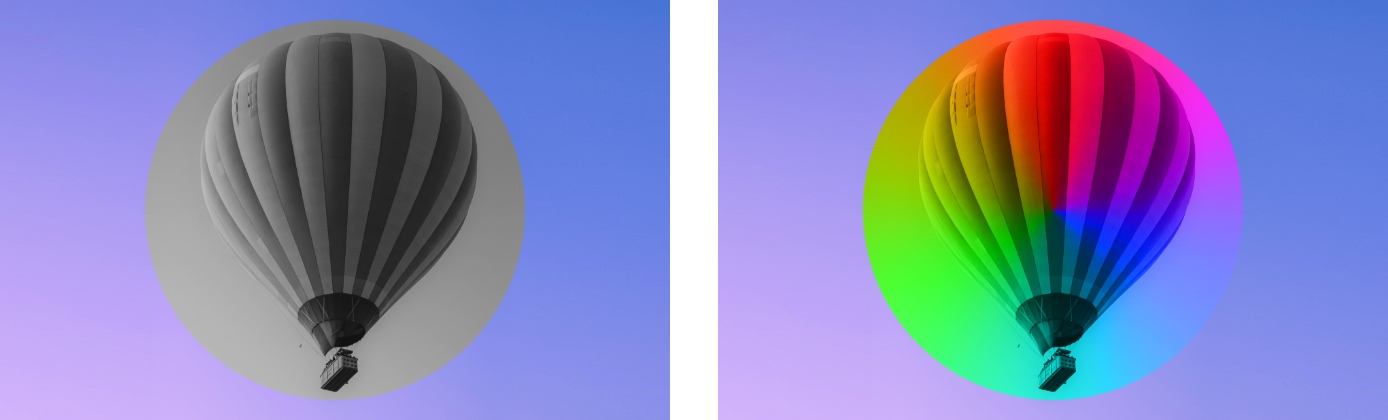
In Pixelmator Pro, there are 26 different blend modes arranged into groups that create similar results: darkening, lightening, contrast, inversion, and component. The examples of each blend mode group in the sections below are created by combining the following two reference images:
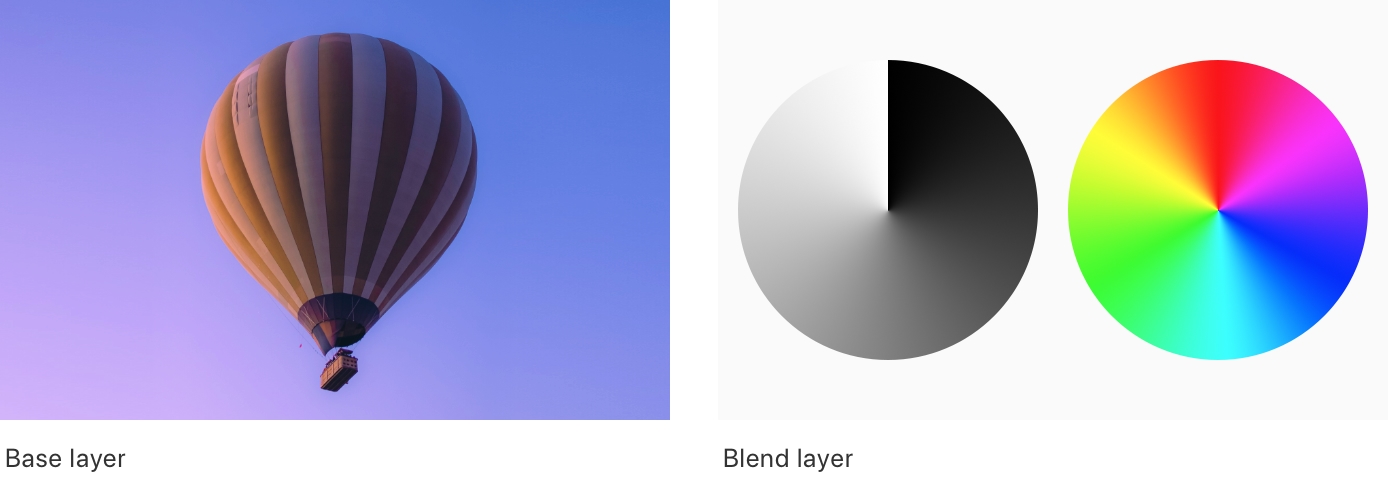
When blending images, the image that's higher up the layers list is called the blend layer, and the layer that's below it is the base layer. In the examples, the color wheels layer is the blend layer and the hot air balloon is the base layer. It's important to note that some blend modes behave differently depending on whether the color wheels or the hot air balloon image is on top.
When examining the results, pay attention to the brightest and the darkest areas of the black and white gradient, as well as to the highlights and shadows in the image of the hot air balloon. These show you how each blend mode treats the whites and blacks in an image. Other colors illustrate how each of the blend modes handles overlapping midtones. For instance, the yellow, red, pink, and blue shades, in particular, all have very different color and luminance values that change from example to example.
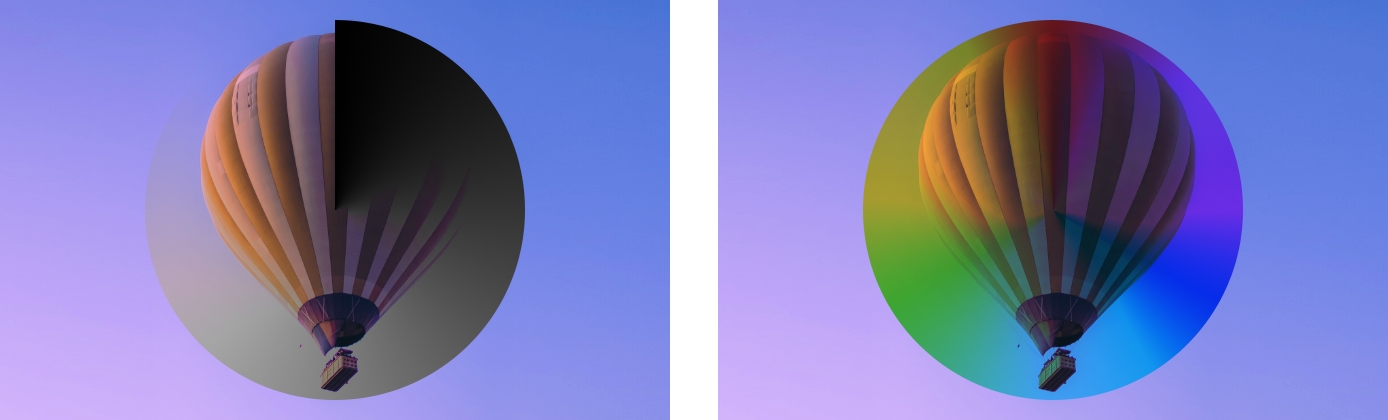
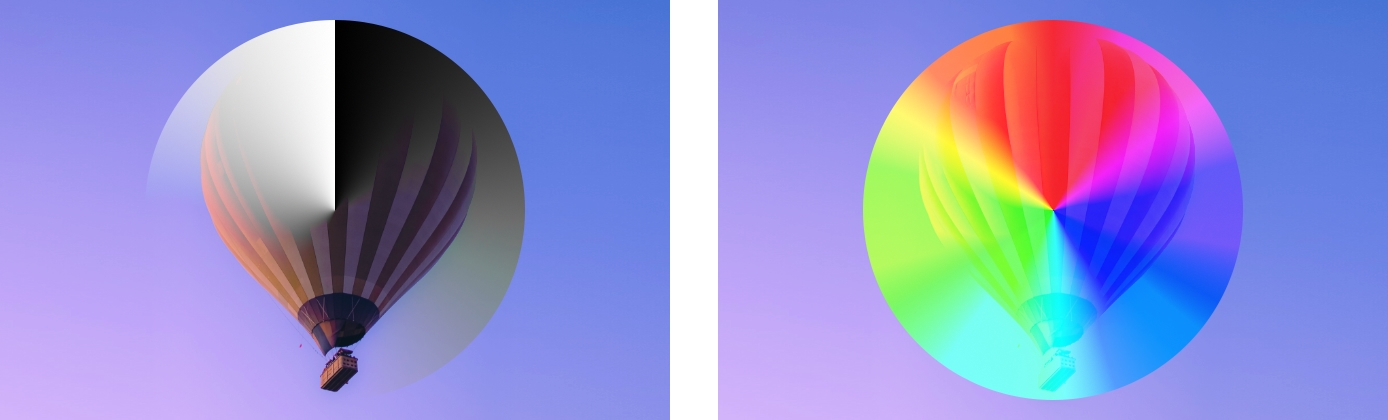
Normal blend mode
The Normal blend mode is the default blend mode for all layers. When it's set to 100% opacity, no color mixing occurs between the blend and the base layers.
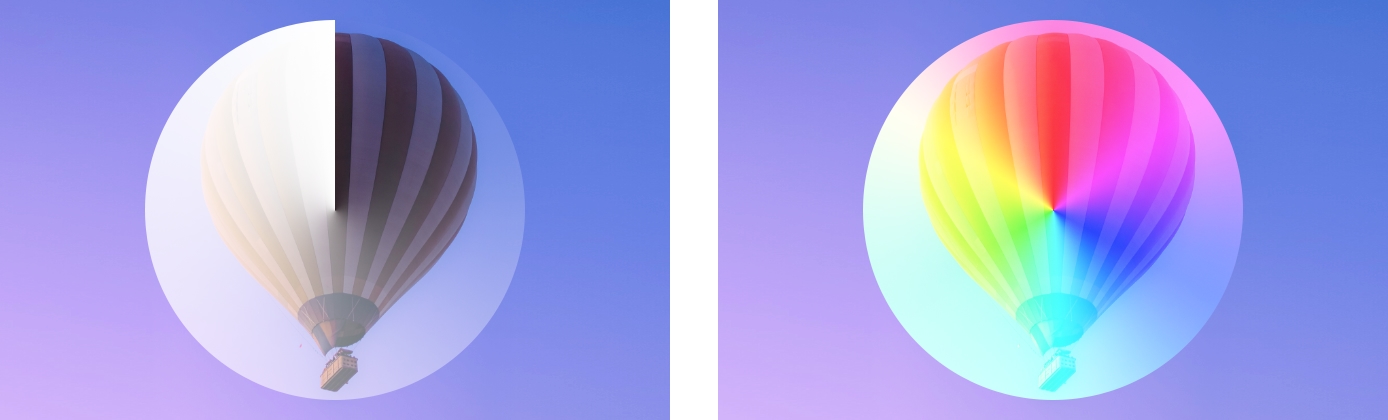
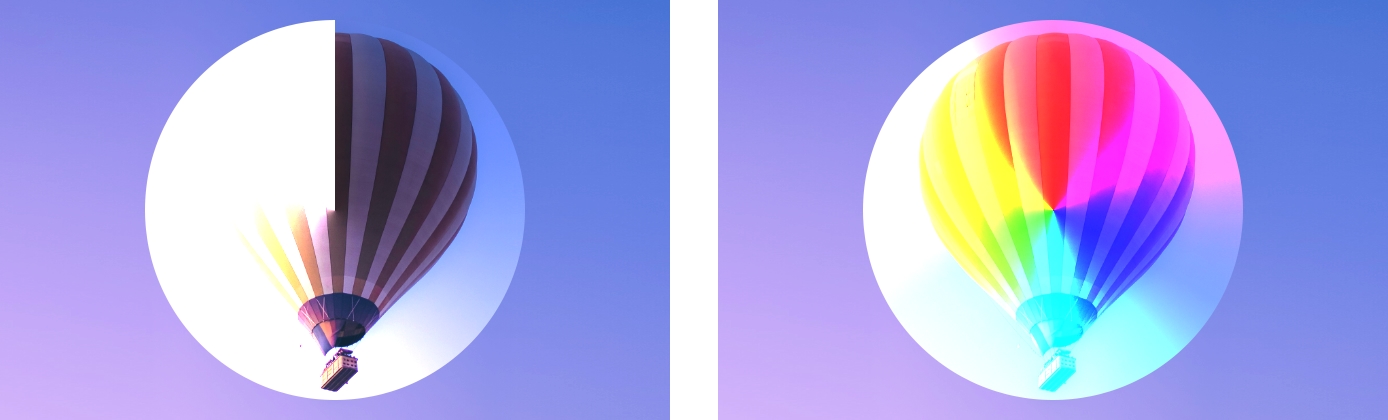
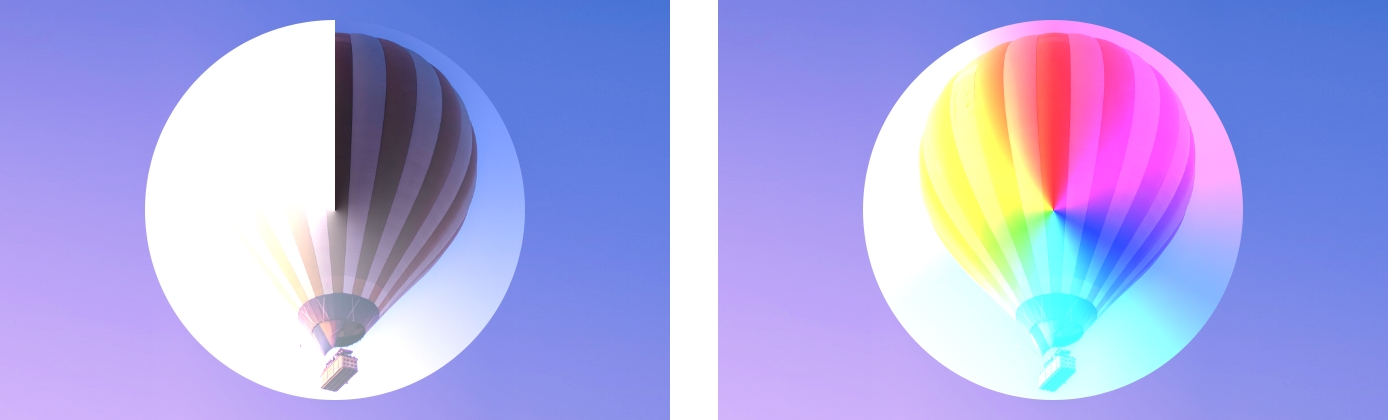
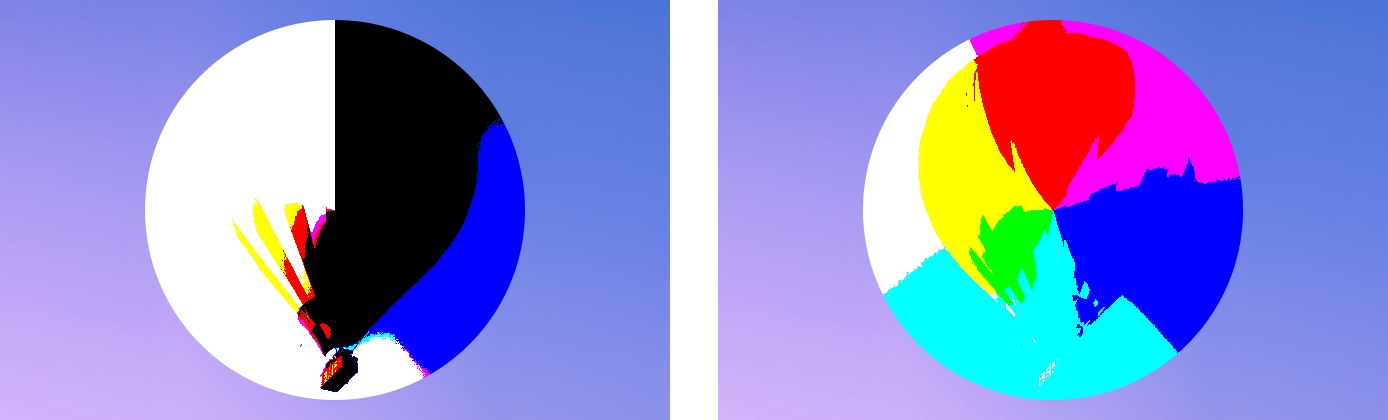
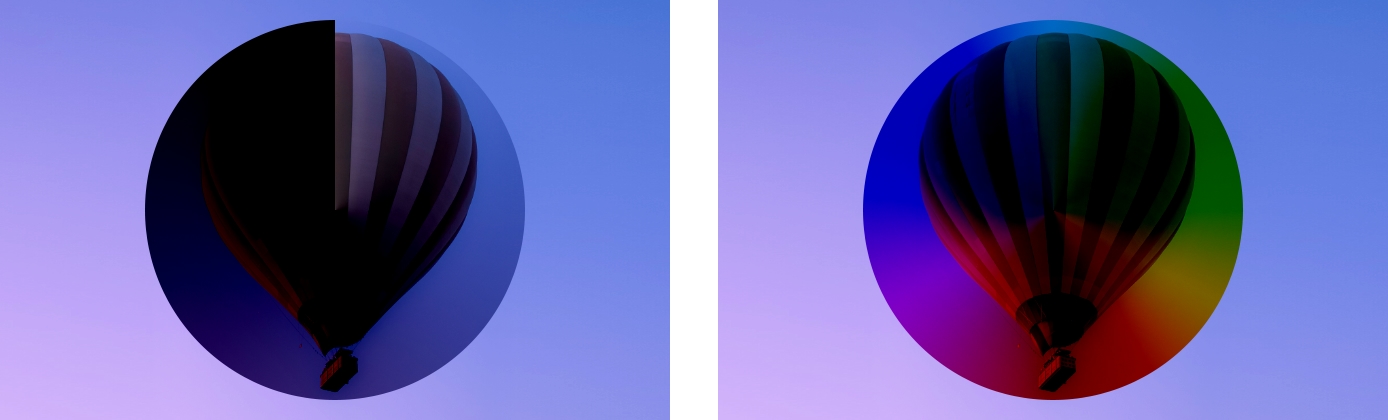
Darkening blend modes
When blending layers using blend modes in the Darken group, the resulting colors will usually be darker than either the base layer or the blend layer.
Darken: Emphasizes the darkest parts of each overlapping layer by making the lighter color values translucent and keeping the darker color values fully opaque. If the base layer color is the same as the color of the blend layer, the image remains the same.
Multiply: Emphasizes the darkest parts of each overlapping layer, evenly mixing the midtones of both layers. The result is always a darker image.
Color Burn: Intensifies the darker areas of a base layer by saturating the midtones and reducing the highlights. The Multiply blend mode is useful for making image colors more intensive. If the blend layer color is white, the image remains the same.
Linear Burn: Similar to Multiply, except the midtones are slightly darker than Multiply and less saturated compared to Color Burn.
Darker Color: Compares the color values of the blend and base layers and only keeps the color values that are darker. The Darker Color does not produce a third color, which usually appears when blending layers using the darkening blend modes.
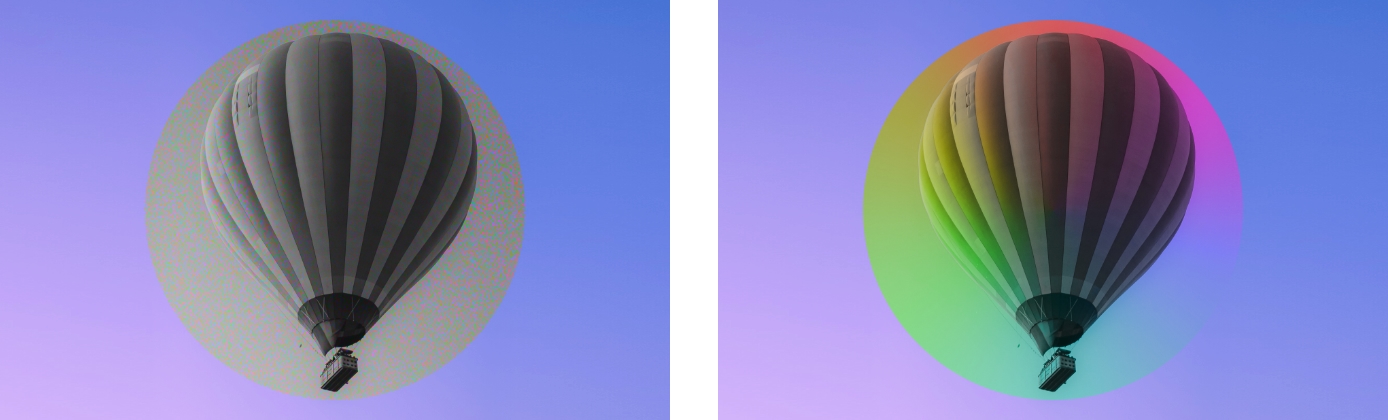
Lightening blend modes
When blending layers using blend modes in the Lighten group, the resulting colors will usually be lighter than either the base layer or the blend layer.
Lighten: The opposite of the Darken blend mode. Emphasizes the highlights of each overlapping layer by making the darker color values translucent and keeping the lighter color values fully opaque. If the base layer color is the same as the color of the blend layer, the image remains the same.
Screen: The opposite of the Multiply blend mode. Emphasizes the highlights of each overlapping layer, evenly mixing the midtones of both layers. The result is always a lighter image.
Color Dodge: The opposite of the Color Burn blend mode. It intensifies the lighter areas of a base layer by saturating the midtones and increasing highlights. The Color Dodge blend mode is useful for making image colors more intensive. If the blend layer color is black, the image remains the same.
Linear Dodge: The opposite of the Linear Burn blend mode and similar to Screen, except that lighter midtones in overlapping regions become more intensive.
Lighter Color: The opposite of the Darker Color blend mode. Compares the color values of the blend and the base layers and only keeps the color values that are lighter. Lighter Color does not produce a third color, which usually results from the lightening blend modes.
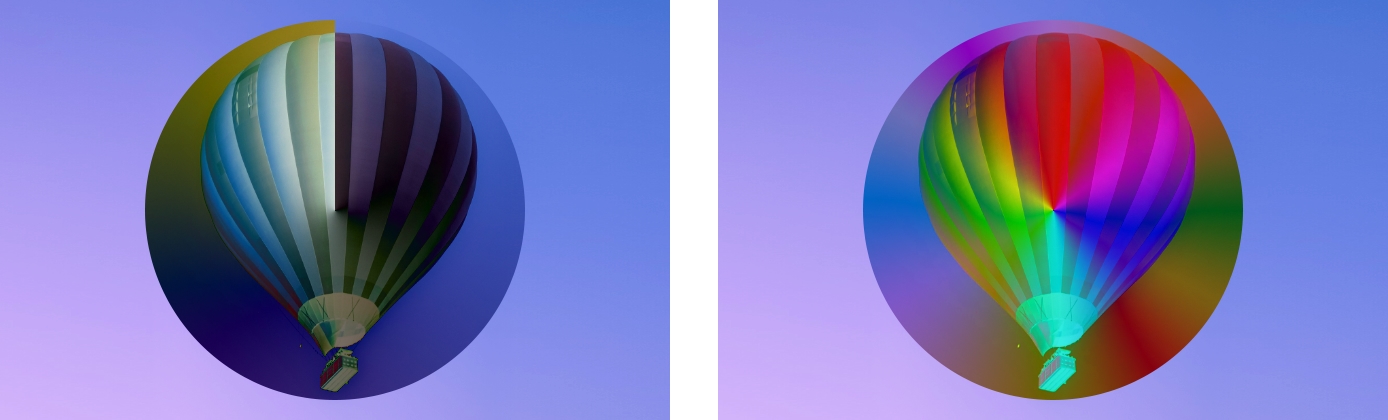
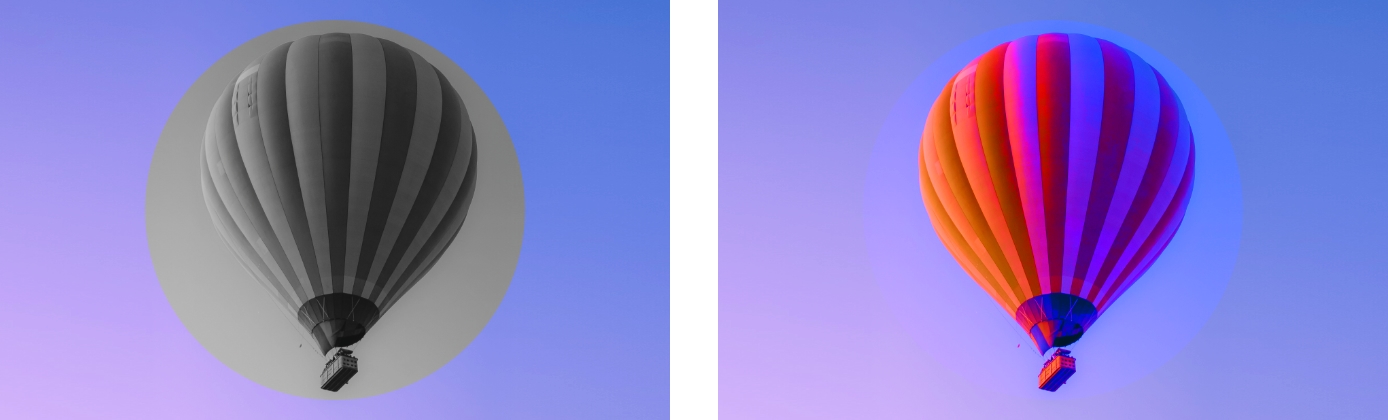
Contrast blend modes
The contrast blend modes look at the base layer to determine if its colors are darker than 50% gray or lighter than 50% gray and mix colors accordingly. If the colors are 50% gray — the image doesn't change.
Overlay: Intensifies contrast by darkening the colors darker than 50% gray and washing out colors lighter than 50% gray. The Overlay blend mode is useful for combining areas of vivid color in two images.
Soft Light: Similar to the Overlay blend mode, but offers slightly milder contrast and more even tinting. The order of two layers affected by the Soft Light blend mode is important. The Soft Light blend mode is useful for softly tinting a base layer by mixing it with the colors in a blend layer.

Hard Light: Intensifies contrast by mixing colors depending on the brightness of the base color values. Colors darker than 50% gray are darkened as if adding the Multiply blend mode, and colors lighter than 50% gray are lightened as if adding the Screen blend mode.
Vivid Light: Similar to the Hard Light blend mode. Colors darker than 50% gray are darkened by increasing contrast, and colors lighter than 50% gray are lightened by decreasing contrast. Reversing the two overlapping layers results in subtle differences in how the overlapping midrange color values are mixed together.
Linear Light: Similar to the Hard Light blend mode, except that overlapping midrange color values are mixed together with higher contrast.
Pin Light: If the blend layer colors are darker than 50% gray, color values lighter than 50% gray are replaced, while the values darker than 50% gray don't change. If the blend layer colors are lighter than 50% gray, color values darker than 50% gray are replaced, while the values lighter than 50% gray don't change. The result might appear alternately tinted or solarized and can be useful for creating interesting artistic effects.
Hard Mix: Increases contrast by boosting saturation of the overlapping midrange color values. Although the order of two layers doesn’t affect the overall look of two layers blended using the Hard Mix blend mode, there might be subtle differences. This blend mode can be useful for creating posterization effects.
Inversion blend modes
The inversion blend modes create results resembling aspects of a photographic negative of the selected layer.
Difference: Looks at the difference between the color values of the base and the blend layers. The larger the difference between the base and the blend layer colors, the brighter the result color. For instance, if the blend and the base layers are exactly the same, the Difference blend result would be 100% black.
Exclusion: Similar to Difference but offers a slightly lower contrast.
Subtract: In areas where the base layer is lighter than the blend layer, the base layer is darkened. In areas where the base layer is darker than the blend layer, the colors are inverted.
Divide: The opposite of the Subtract blend mode. In areas where the base layer is darker than the blend layer, the base layer colors are lightened.

Component blend modes
The component blend modes mix primary color components such as hue, saturation, brightness, and luminance.
Hue: Mixes the luminance and saturation of the base layer colors and the hue of the blend layer colors.
Saturation: Mixes the luminance and hue of the base layer and the saturation of the blend layer.
Color: Mixes the luminance of the base layer and the hue and saturation of the blend layer. This preserves the gray levels in the image and is useful for coloring monochrome images and for tinting color images.
Luminosity: The opposite of the Color mode. Mixes the hue and saturation of the base layer and the luminance of the blend layer.