Table of Contents
Change the image size
You can change the size of images to reduce or enlarge them. The image size can be set using pixels or a print unit, such as inches or centimeters. However, print units on their own have no relationship to pixels because a pixel has no physical size. For this reason, there is an additional Resolution field that specifies how many pixels should be printed in an inch or centimeter.
If you are working on an image for the web or one that will only be displayed on a screen, you should size and resize images using pixels (and you can ignore the Resolution setting completely). If you are working on an image that will be printed, you should use print units with an appropriate resolution.
When resizing images, you can also choose from four image scaling algorithms, including the machine learning-powered Super Resolution (available on macOS 10.14 and later).
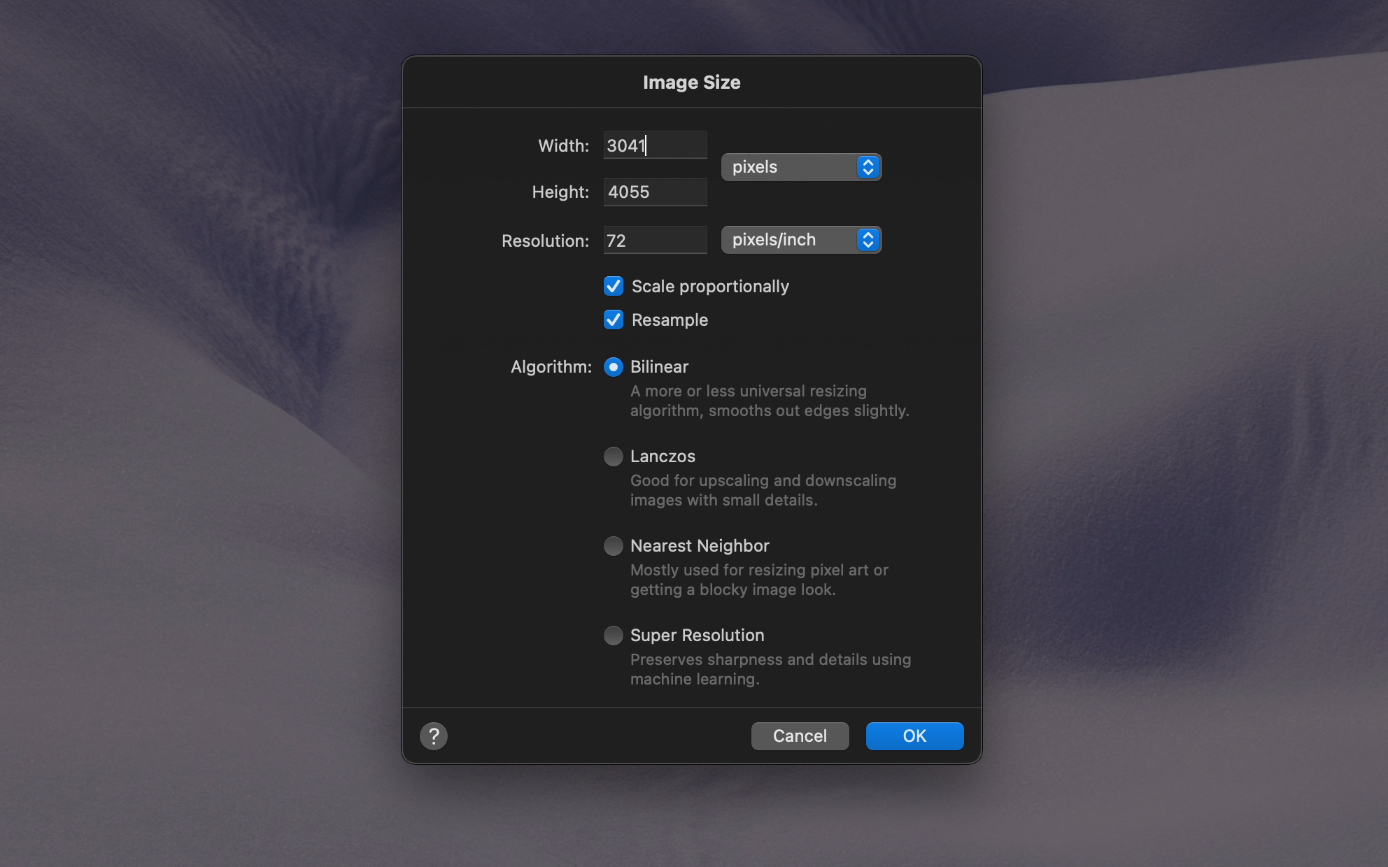
Change the pixel dimensions of an image
- Do one of the following:
- Choose Image > Image Size (from the Image menu at the top of your screen).
- Press + + on your keyboard.
Choose pixels from the Unit pop-up menu.
Enter a new width and height for the image or use text field math to calculate it.
Note: If you’d like to resize the image without keeping its original proportions, deselect the Scale proportionally checkbox.
Click OK to apply your changes or Cancel to cancel them.
Note: When changing the pixel size of an image, the Resolution has absolutely no effect on the actual size or quality of the image. The standard number used is 72 or 300, but this is essentially placeholder text for any image sized in pixels. If you need to change the print size of an image, see the section below.
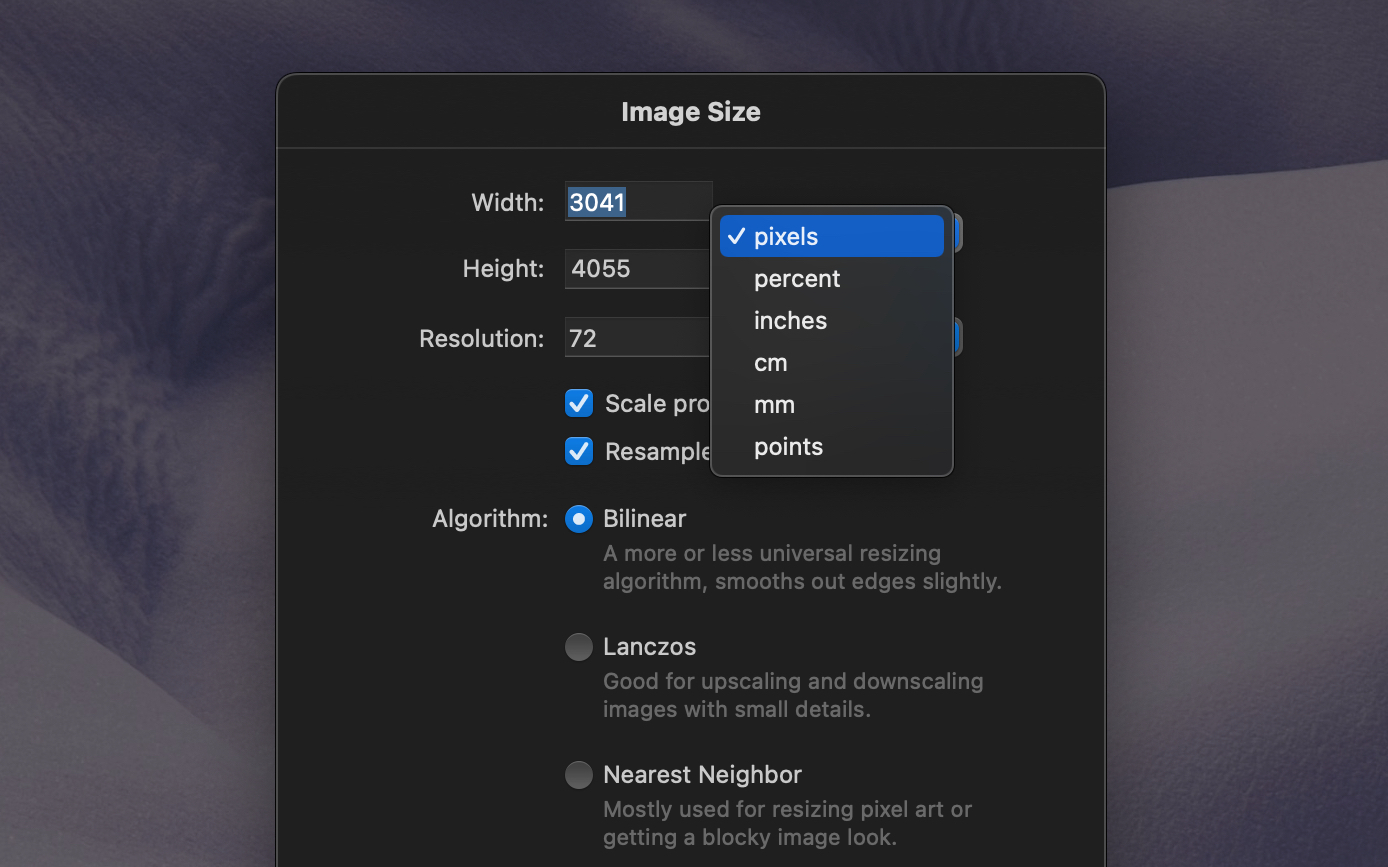
Change the print dimensions of an image
- Do one of the following:
- Choose Image > Image Size (from the Image menu at the top of your screen).
- Press + + on your keyboard.
- Choose a print unit (inches, cm, mm, or points) from the Unit pop-up menu.
Enter a new width and height for the image or use text field math to calculate it.
Note: If you’d like to resize the image without keeping its original proportions, deselect Scale proportionally.
Enter a new resolution for the image.
When you change the print dimensions of an image, you’re essentially changing its pixel dimensions indirectly by letting Pixelmator Pro calculate the size for you. The basic formula for this is Print Size x Resolution = Pixel Dimensions. So, if you have a 10x10 inch image at 300 PPI, its pixel size would be 3000x3000. Note: If you’d like to change the print dimensions of an image without changing the quality of the image (or its pixel dimensions), deselect the Resample checkbox. This way, changing the resolution will automatically change the print dimensions and vice versa, ensuring the pixel size of the image stays the same. Note that because you'll be changing the physical size of the image, pixels as measurement units will be grayed out.
5. Click OK to apply your changes.
Tip: The standard resolution for high-quality prints is 300 pixels/inch (PPI), although a lower resolution is often used for larger posters and other media that is viewed from a distance where it would be difficult to see individual pixels. For web graphics and images, a resolution of 72 PPI is often used as the default, although this is essentially placeholder text as web images should always be sized in pixels.
Choose a different image scaling algorithm
In Pixelmator Pro, you can resize images using one of four scaling algorithms: Bilinear, Lanczos, Nearest Neighbor, and Super Resolution.
To choose a scaling algorithm:
- Do one of the following:
- Choose Image > Image Size (from the Image menu at the top of your screen).
- Press + + on your keyboard.
- Select the algorithm:
The Bilinear algorithm is more or less the standard in image editing. It tries to naturally smooth edges (transitions between light and dark colors) by guessing the intermediate colors, so it's useful for photographic images. However, this can sometimes cause blurry images (especially when upscaling).
The Lanczos algorithm is designed to preserve small details when upscaling and downscaling, which is useful for things like graphics, though it's important to watch out for haloing issues.
The Nearest Neighbor algorithm is mostly used for pixel art, as it copies the color of the nearest neighboring pixels resulting in the classic blocky image look.
Super Resolution (available on macOS 10.14 and later) is a machine learning-powered scaling algorithm, trained to intelligently upscale images while preserving details that can often be lost when using traditional scaling. Unlike the regular scaling algorithms that interpolate the values of pixels mathematically, Super Resolution looks at the image itself, analyzing the patterns and textures in it, then recreates visually important details in larger dimensions. You can achieve great results when upscaling images to even three times their original resolution. To learn more about Super Resolution and how we've built it, check out our comprehensive blog post.
