Table of Contents
Use clipping masks
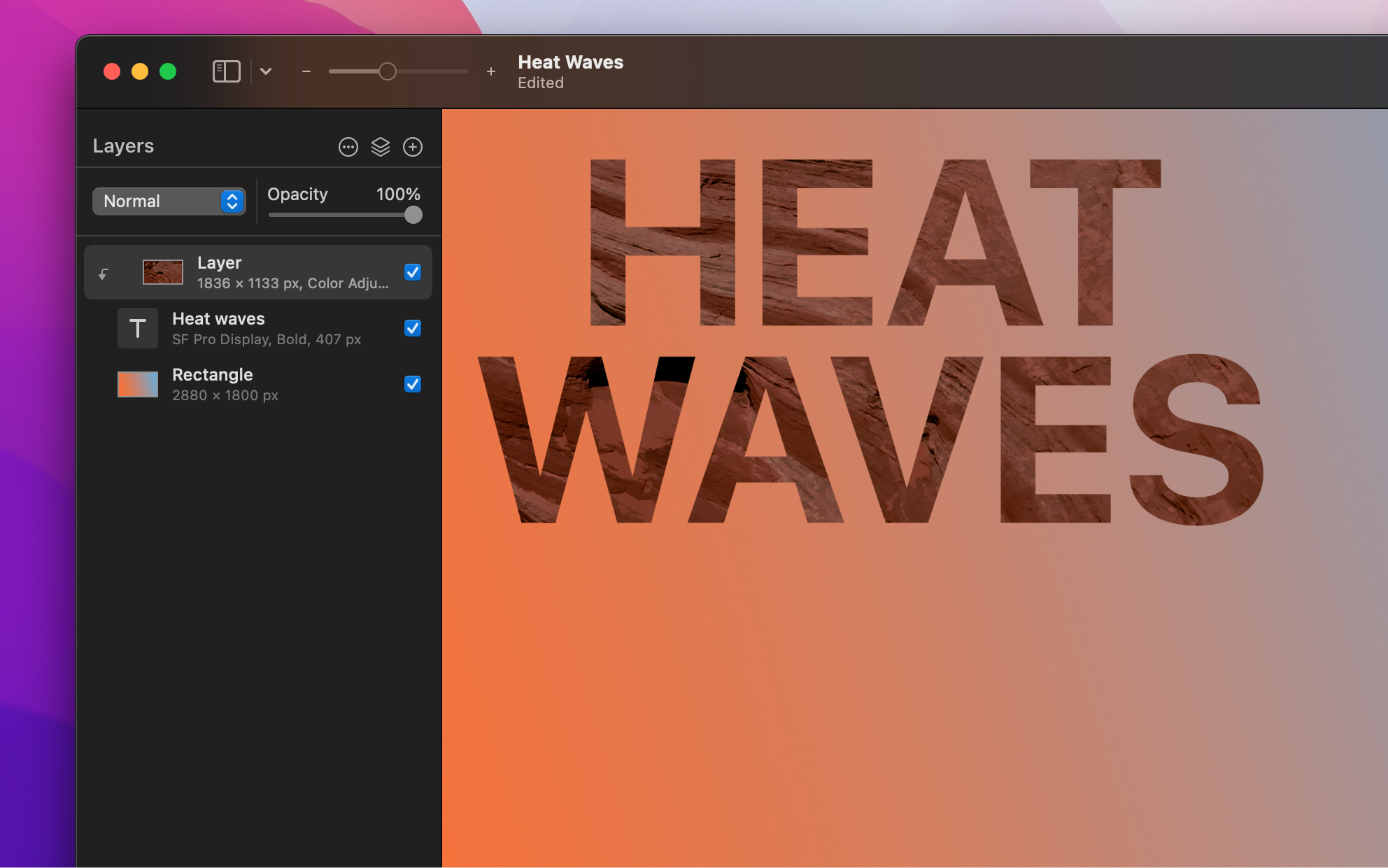
A clipping mask is a type of mask that clips two or more layers together, forming a group of layers called a clipping set. In a clipping set, the bottommost layer (also called the base layer) sets the boundaries for the entire group. Any parts of the upper layers that go beyond the edges of the bottommost layer are hidden or, in other words, masked.
Create a clipping mask
Select a layer or layer group you'll be using as a base layer and move it below the layer or layer group that you'll be clipping to.
For example, you can quickly round the corners of an image by clipping it to an elliptical shape. In such a case, the clipping mask should be created on the image layer that's placed above the shape layer.
Do one of the following:
- In the Layers sidebar, – click the layer or layer group you'd like to mask and select Create Clipping Mask.
- Choose Format > Mask > Create Clipping Mask (from the Format menu at the top of your screen).
- Press and hold the key and click between the layers you want to become a clipping set.
- Press + + on your keyboard.

Release a clipping mask
Do one of the following:
- – click the layer or layer group that has the clipping mask applied and select Release Clipping Mask.
- Choose Format > Mask > Release Clipping Mask (from the Format menu at the top of the screen).
- Press and hold the key and click between the layers you want to unlink.
- Press + + on your keyboard.


