Table of Contents
Fill with the Gradient Fill tool
The Gradient Fill tool fills layers with your chosen gradient — a gradual transition between multiple colors. You can choose from the gradient presets that come with Pixelmator Pro or create and save your own. You can also fill any layer with a gradient using the Gradient Fill effect.
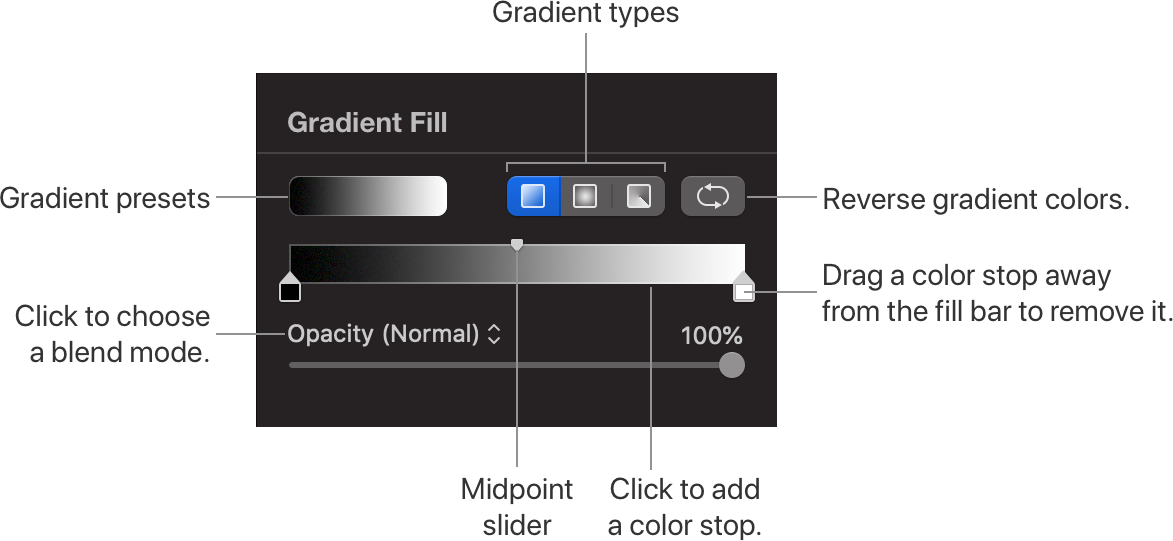
A gradient will always have at least two colors. Each color is represented by color stops on a fill bar. You can change how the gradient looks like by adding or removing stops, adjusting their position, and setting the color and transparency of each.
Fill with the Gradient Fill tool
Choose the Gradient Fill tool by doing one of the following:
- Click
 in the
Tools sidebar or choose it from the
grouped tools.
in the
Tools sidebar or choose it from the
grouped tools. - Choose Tools > Gradient Fill (from the Tools menu at the top of your screen).
- Press the key on your keyboard.
- Click
Click the presets well to choose from the available presets or customize any selected gradient:
- Change colors: Click any of the existing color stops to open the Colors window and choose a new color.
- Add additional colors: Click below the gradient bar to add a new color stop.
- Remove colors: To remove a color stop, drag it away from the gradient fill bar.
- Reverse colors: Click Reverse to reverse the gradient colors.
- Choose a gradient type:
Linear gradient: Blends colors between color stops, all along a line.
Radial gradient: Blends from start to end in a circular pattern.
Angle gradient: Blends colors in a sweep.
Drag on the canvas to fill the selected layer with a gradient.
If you'd like to discard all the current changes made with the Gradient Fill tool, click the Reset button at the bottom of the Tool Options pane.


